Follow Along: Linux Commands
Learn useful Linux commands like ls, cd, pwd, mkdir, etc.
Table of contents
- Starting Code
- pwd: Print Working Directory
- tree: See the Directory Tree
- cd: Go to a Specific Directory
- Clear
- ls: List Directory Contents
- mkdir: Create a New Directory
- touch: Create a File
- vi/vim: Command Line Editor
- cat: Print contents of file
- mv: Move/Rename a File
- Reverse Search
- rm: Deleting File/Directory
Let’s get hands on with some basic linux commands. As they say, practice makes perfect. Most of this notebook is comprized of elements from the Linux for Robotics course offered by the Construct linked here.
Starting Code
Open up the Terminal as we will be using it for this tutorial. Execute the following cd command to go the src folder in catkin directory:
cd ~/BWSI_Student_Code/catkin_ws/src
The ~ (tilde) is an alias (alternate name/shortcut) for the home directory of your computer. In long form, the home directory path is known by /home/<your username>.
To learn and practice linux commands, we will clone a repository in this directory:
git clone https://bitbucket.org/theconstructcore/linux_course_files.git
Note If you’re copying the above command on your virtual machine, use
Ctrl-C. To paste into your terminal, useCtrl-Shift-V. To copy from Terminal, useCtrl-Shift-C.
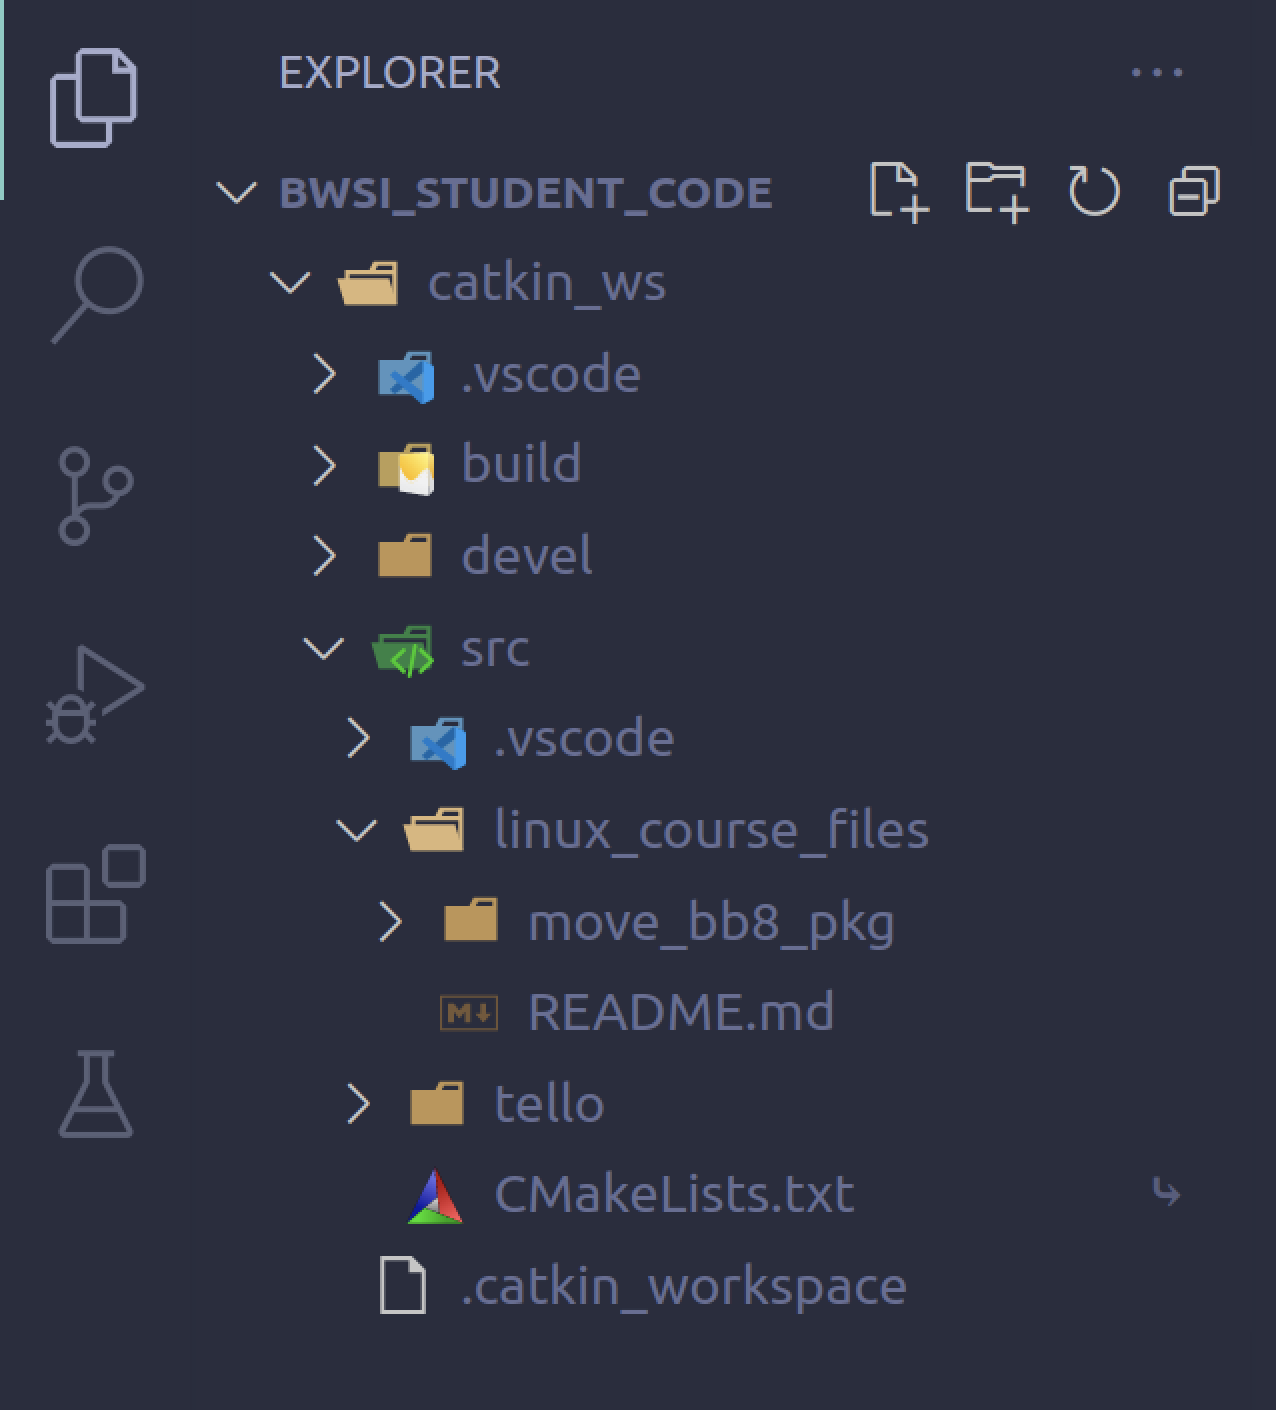
From there, you should see something very similar in VS Code:
pwd: Print Working Directory
If you want to know the exact location (path) of the current directory on your computer, use the pwd command, which stands for “print working directory”.
pwd
You should see the following:
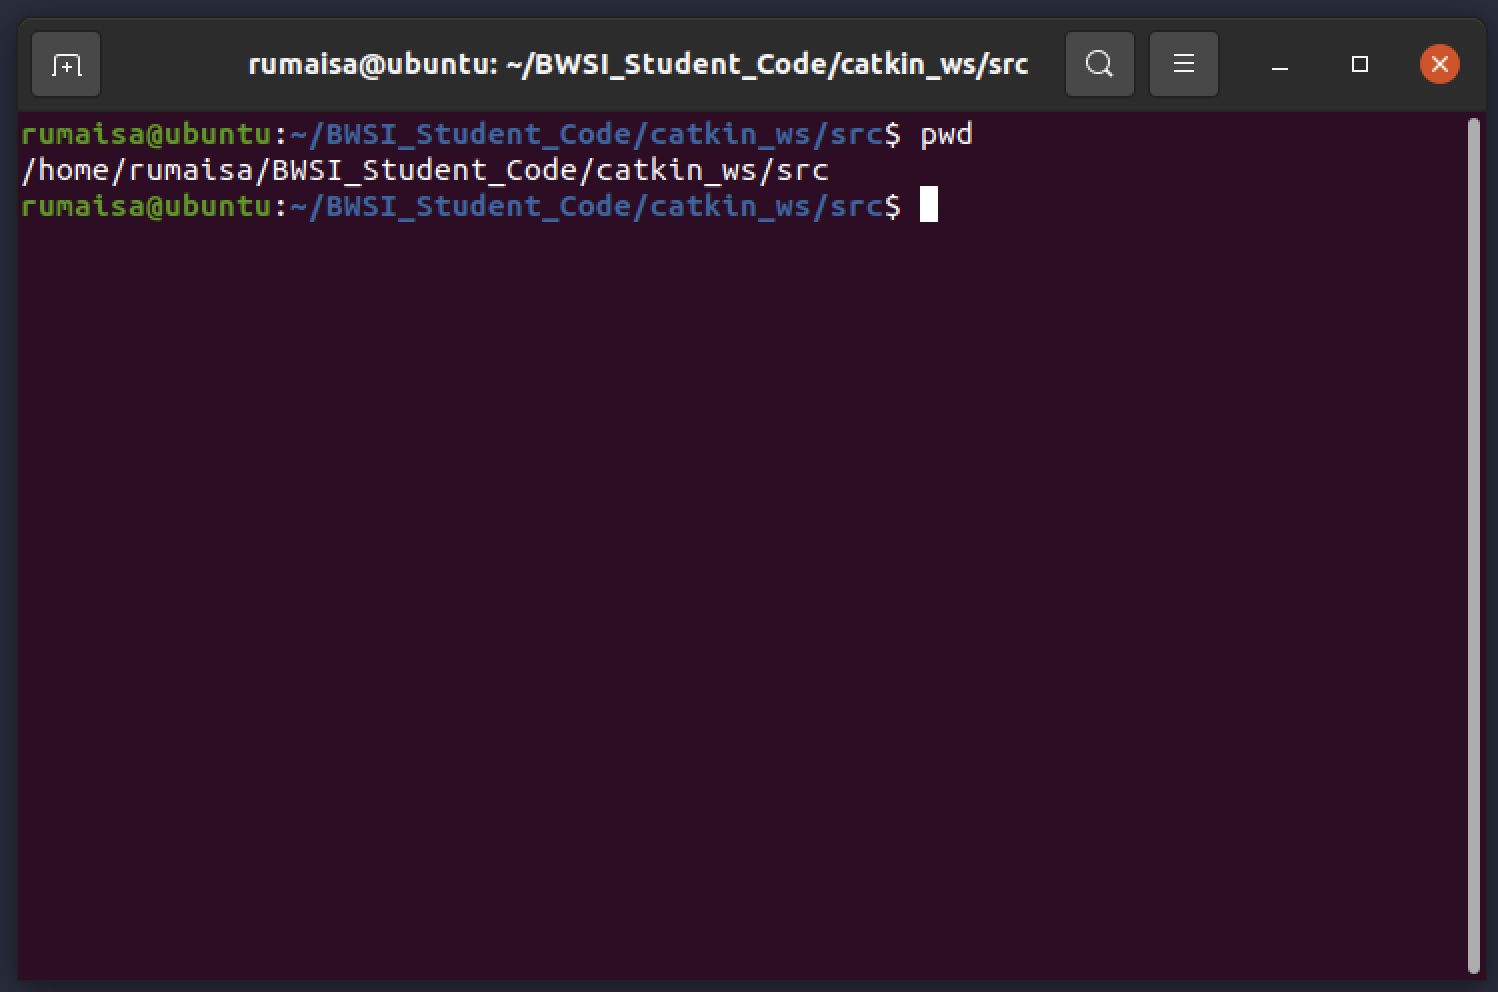
Note that /home/rumaisa is the same as ~.
tree: See the Directory Tree
The tree command is great when you want to see all the files and folders organized in a hierarchical and intuitive structure.
If you are getting that the command tree is not found, you can simply install it with the following command in Terminal:
sudo apt install tree
Execute the following in Terminal to see the file structure:
tree
You should see the very same directory structure as displayed in VS Code:

cd: Go to a Specific Directory
The cd command is one of the most important ones in Linux. It allows you to go into a specific directory/folder.
Absolute Path
For instance, let’s execute the following command:
cd /home/<your username>/BWSI_Student_Code/catkin_ws/src/linux_course_files/move_bb8_pkg/src
Note Be sure to replace
<your username>with your username.
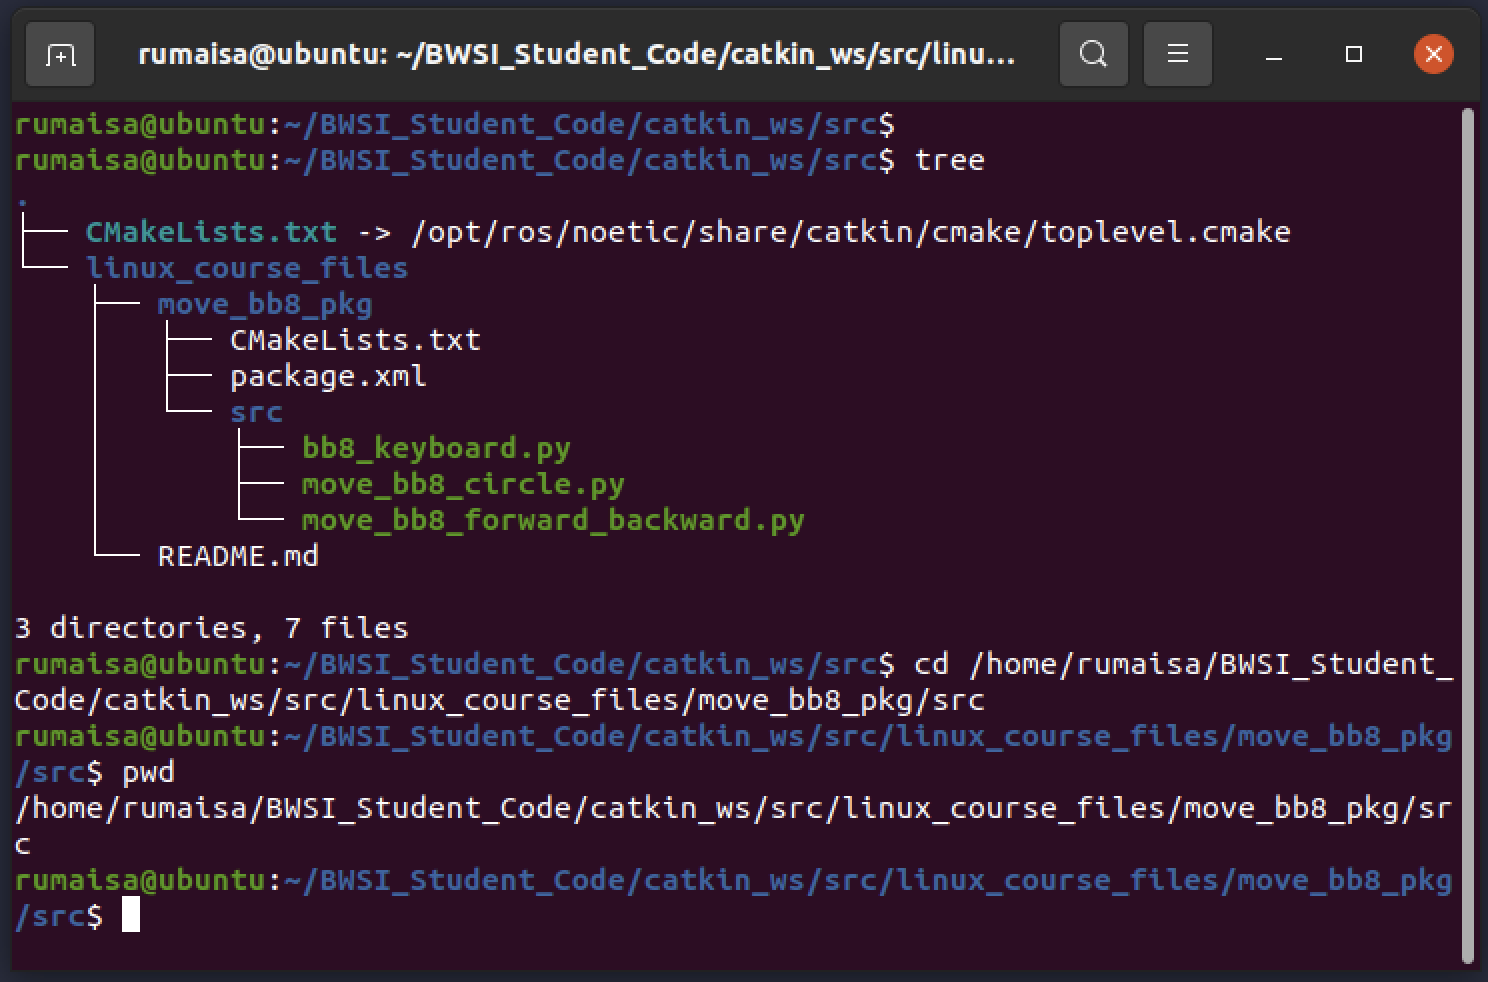
The command you executed has taken you directly to the folder named src, passing though many different folders on its way: <your username>, BWSI_Student_Code, catkin_ws, src, linux_course_files, move_bb8_pkg… The path shown above along with cd is called an absolute path. This command with an absolute path will work anywhere regardless of which folder you are located in the Terminal.
Relative Path
The cd command can also be used to move to a directory using a relative path.
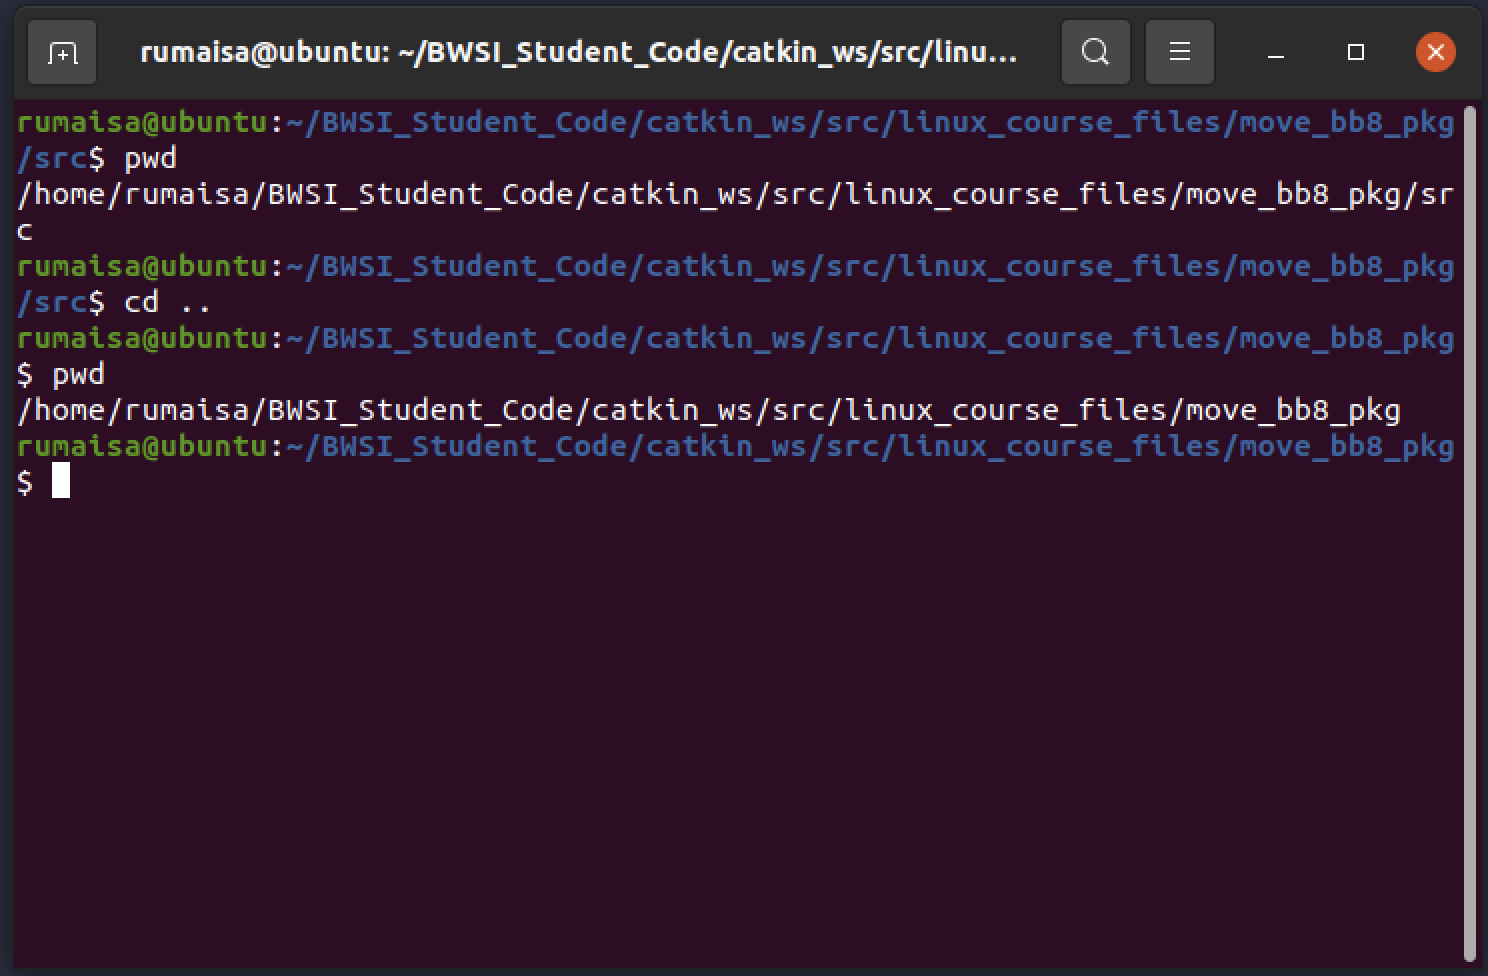
You can use the following command to move one folder/directory outside the folder you are currently located at:
cd ..
You should now be in the following directory:
You can also chain the paths like so:
cd ../..
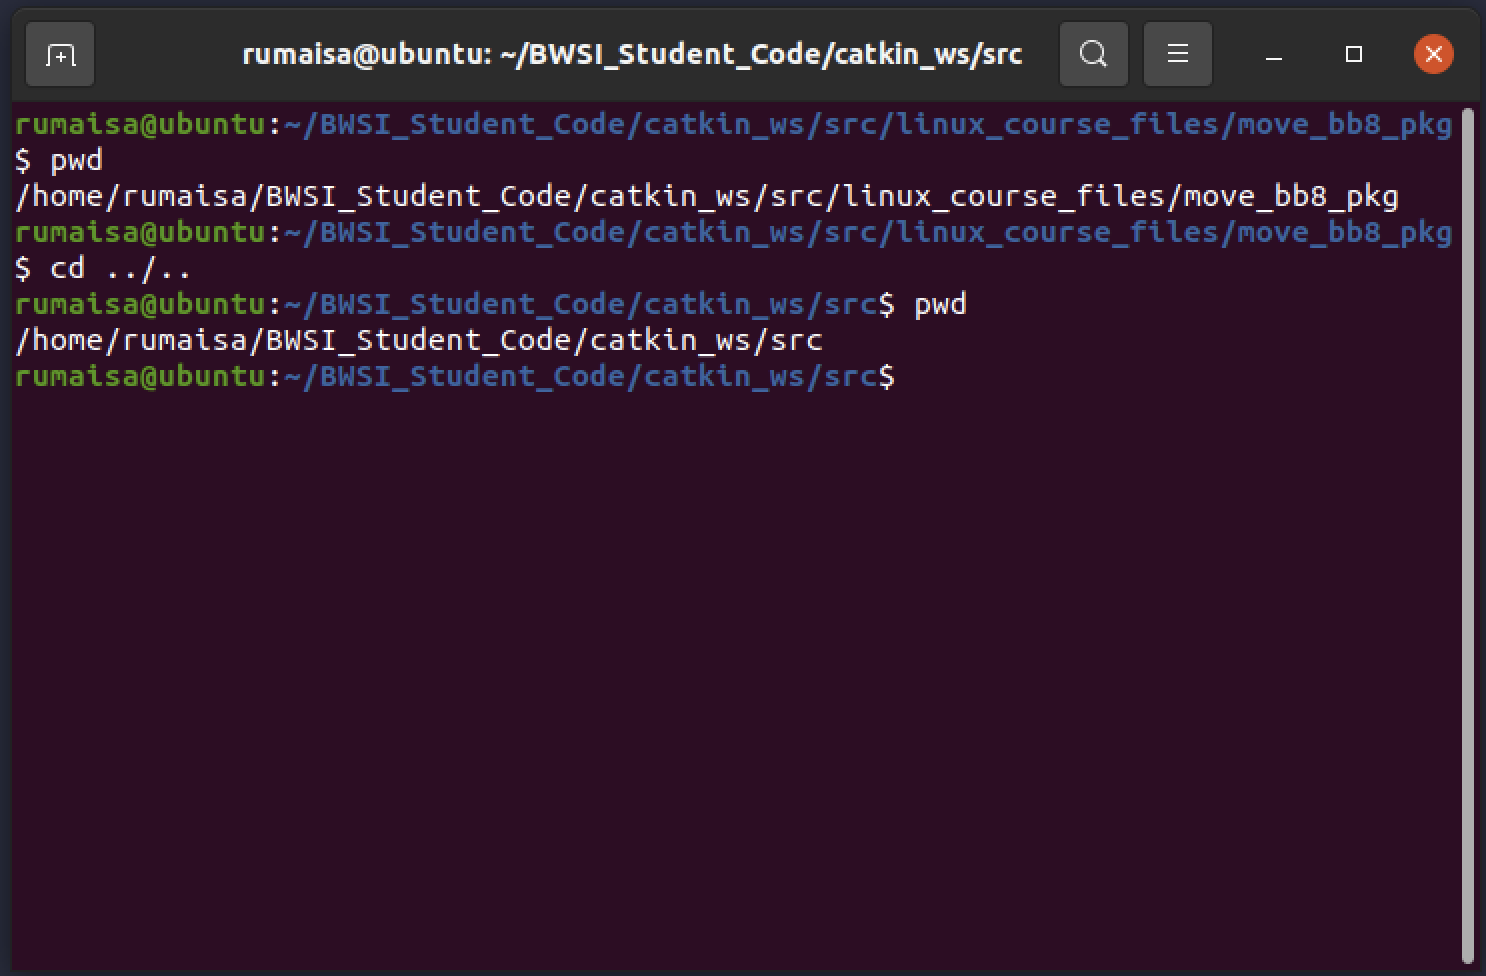
This will go back two folders outside the current folder you are at.
Let’s go back to the folder we were at in the beginning:
cd linux_course_files/move_bb8_pkg/src
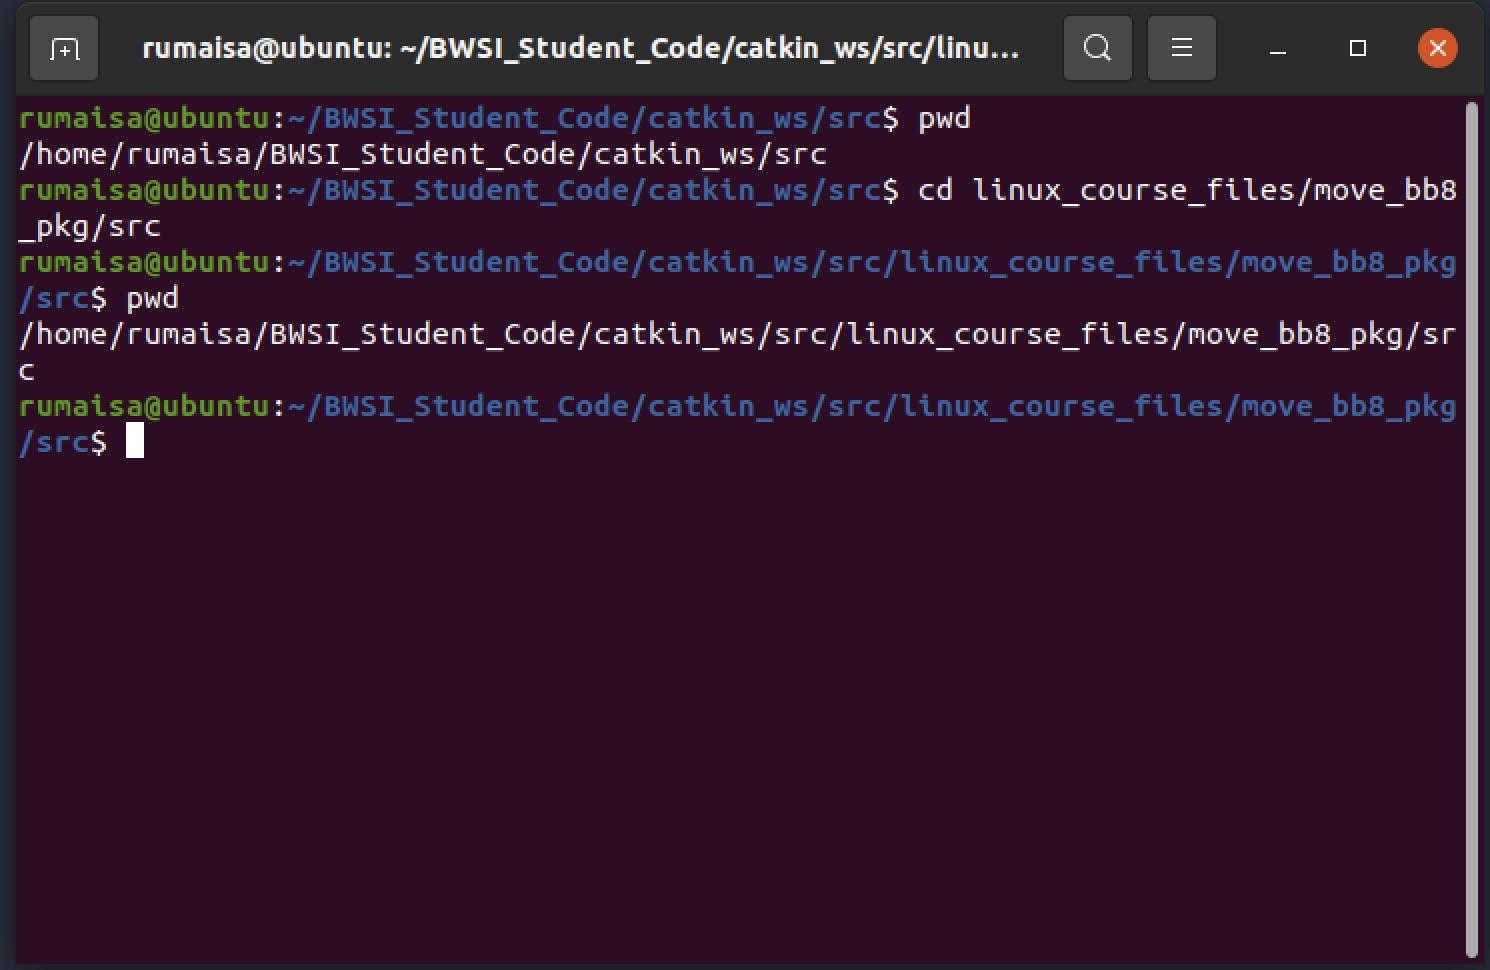
This is called a relative path because it is relative to the current working directory. Unlike commands with absolute path, this command would not work if we were in a different directory than ~/BWSI_Student_Code/catkin_ws/src/.
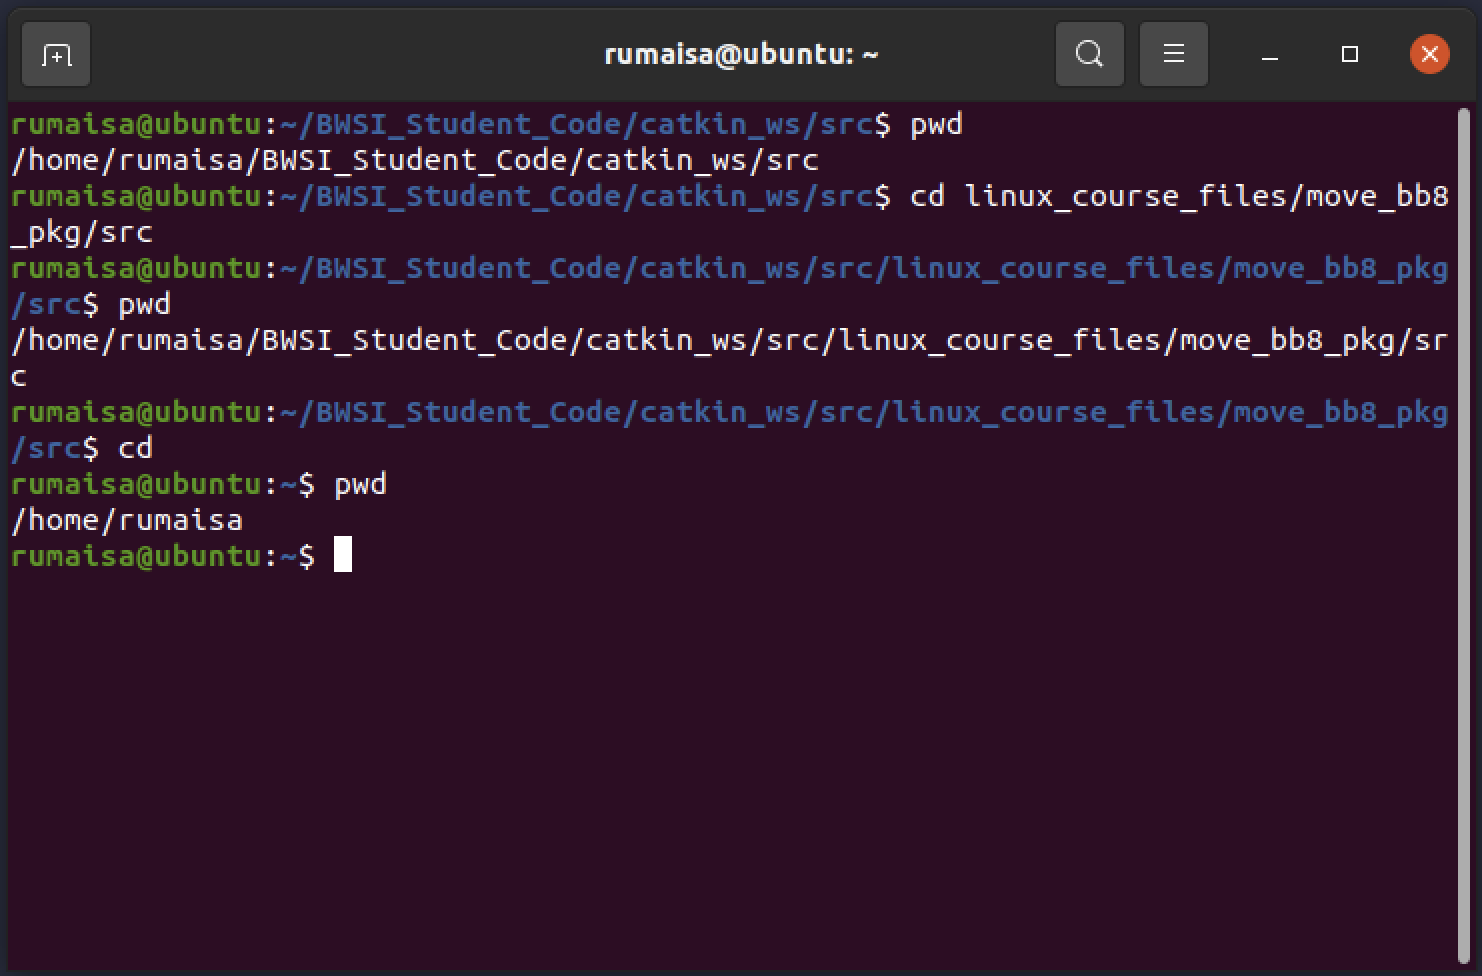
If you want to go back to the home directory, you can use:
cd ~
Or you can use an even shorter command:
cd
Clear
If you have a lot of commands/output on the Terminal screen and you want to start fresh, enter the following:
clear
You should be left with an empty Terminal. Now we’re ready to continue working on the next commands.
ls: List Directory Contents
The simple command ls stands for list and should give you a list of the files or folders in the current directory.
To make it interesting, let’s go back to the repository we cloned:
Note You have already navigated to this directory before. Try looking for it in your most recently-used commands by using the
upanddownarrow keys.
cd ~/BWSI_Student_Code/catkin_ws/src/linux_course_files/move_bb8_pkg/src
Now, let’s use the ls command to see the files in this folder:
ls

ls -l: long list of directory contents
To view a long list of files and folders, use the ls -l command.
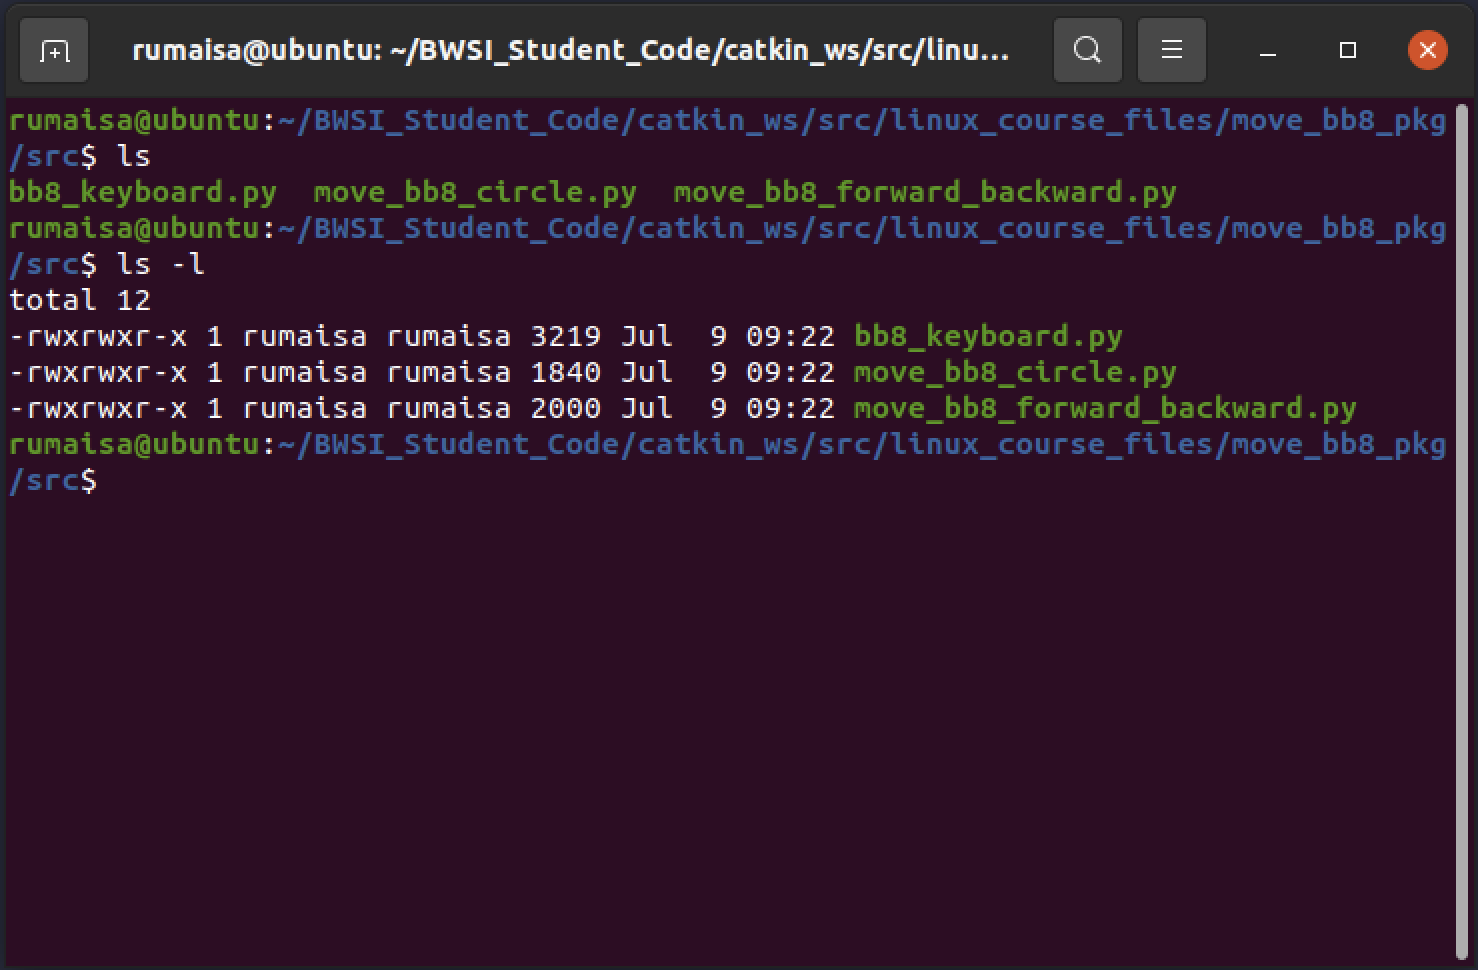
ls -al: long list hidden files
First let’s go back to our home directory with cd, then use the ls -al command.
ls -al
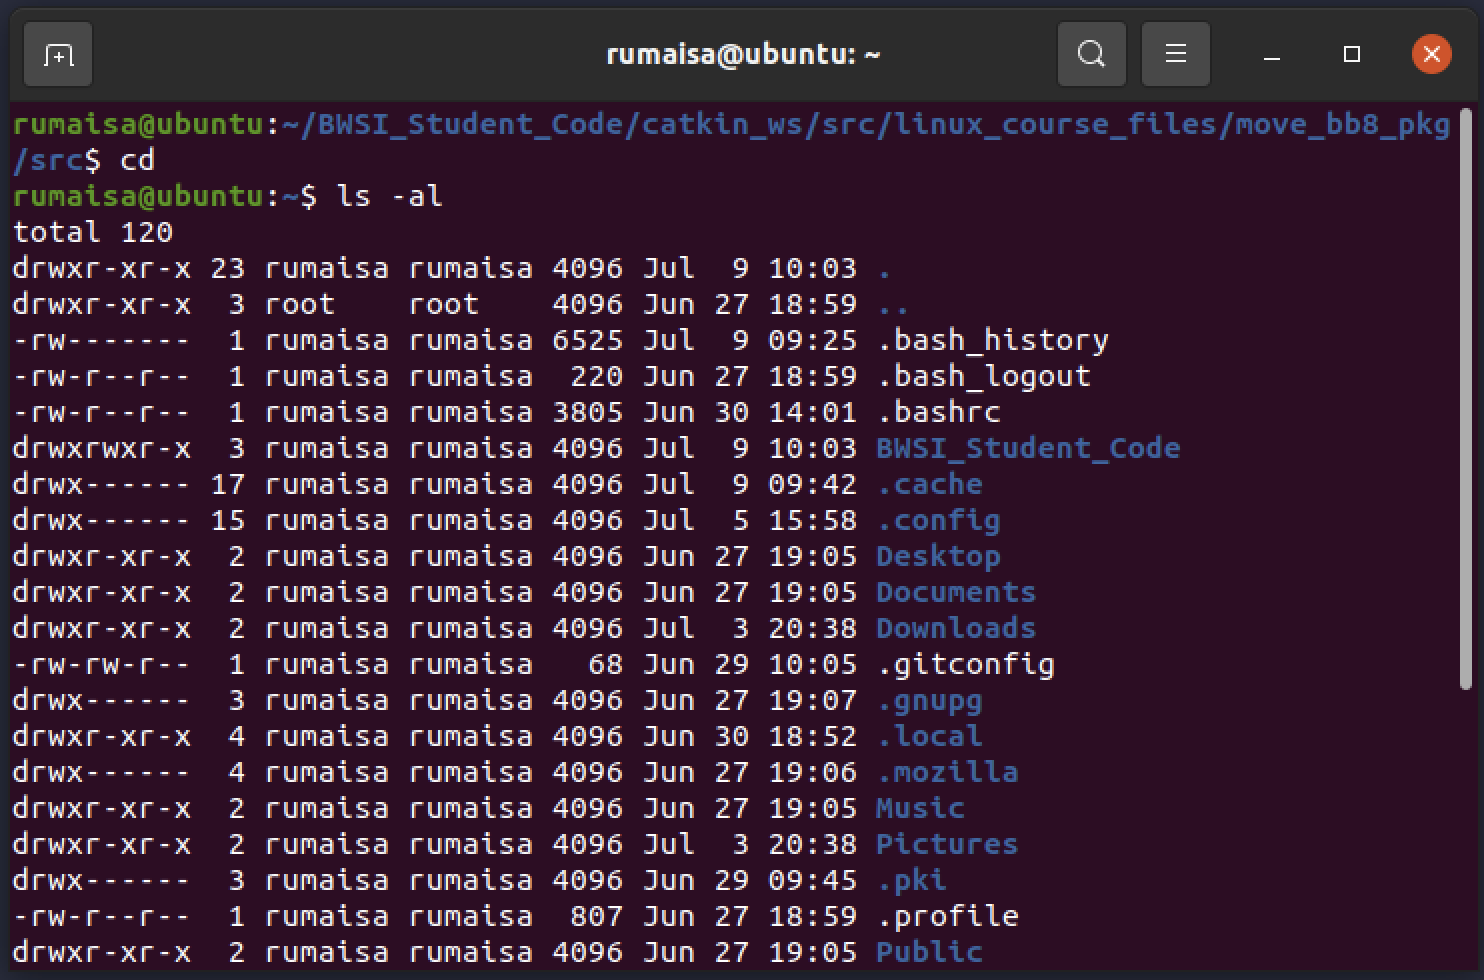
All the files/folders starting with a . (dot) are hidden from view. If you use ls you wouldn’t be able to see them.
mkdir: Create a New Directory
The mkdir command allows you to create a new directory. Make sure you are in your home directory. Then type in the following:
mkdir my_folder
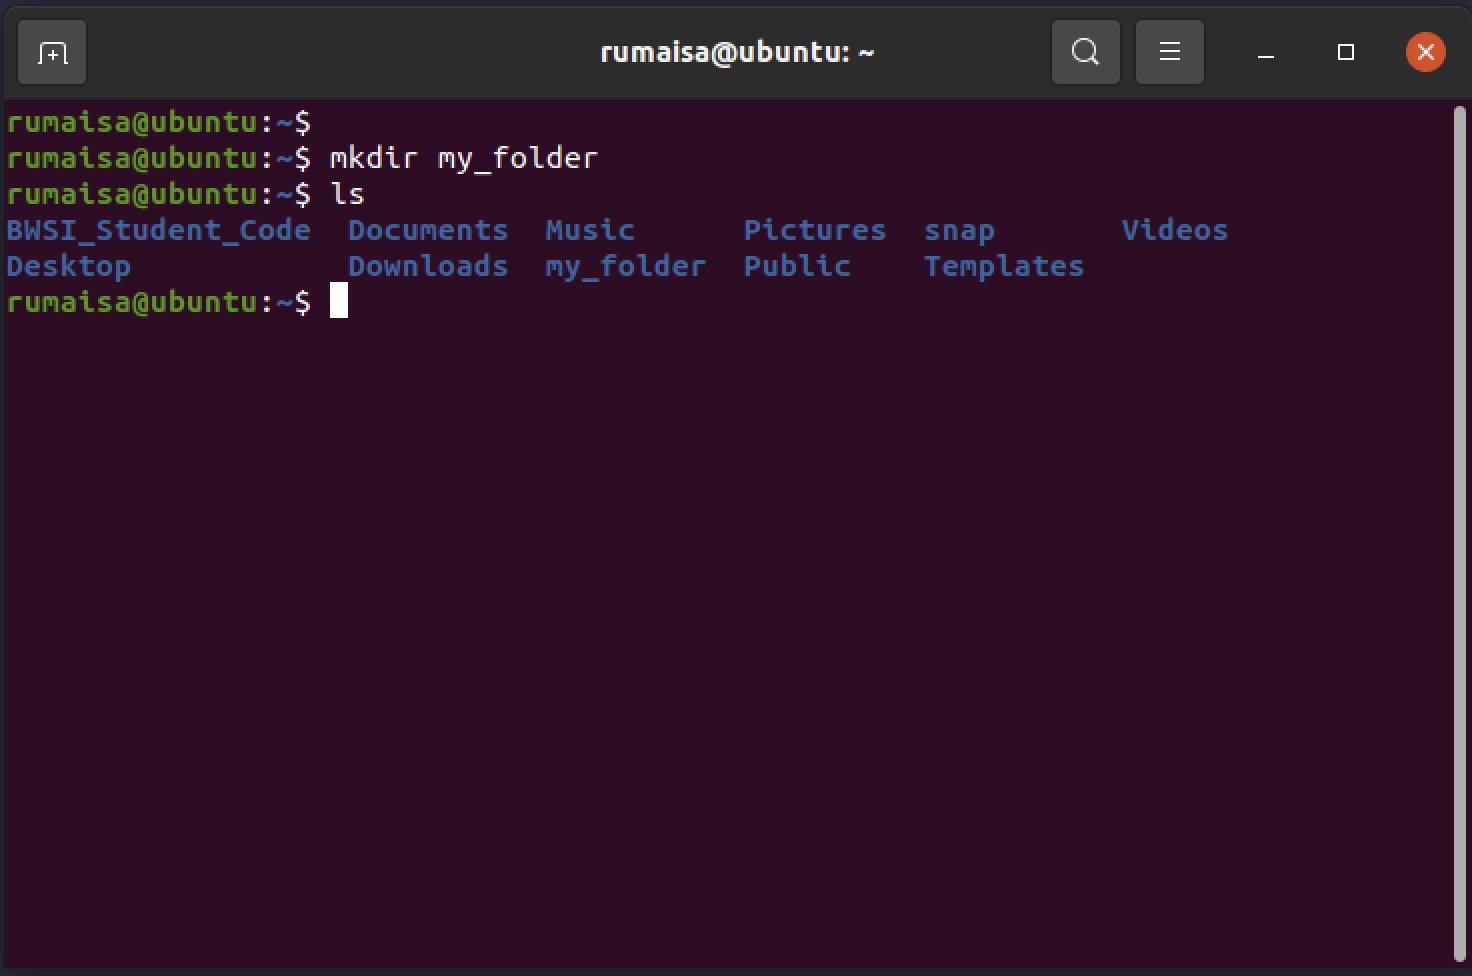
You should now be able to find my_folder in the list of files/foldes using ls.
touch: Create a File
There are a few ways that you can create a file within a Linux operating system, however the most commonly used is with the touch command. Go inside the folder you created in the previous section, and create a new file named my_file.txt.
Step 1
cd ~/my_folder
Step 2
touch my_file.txt
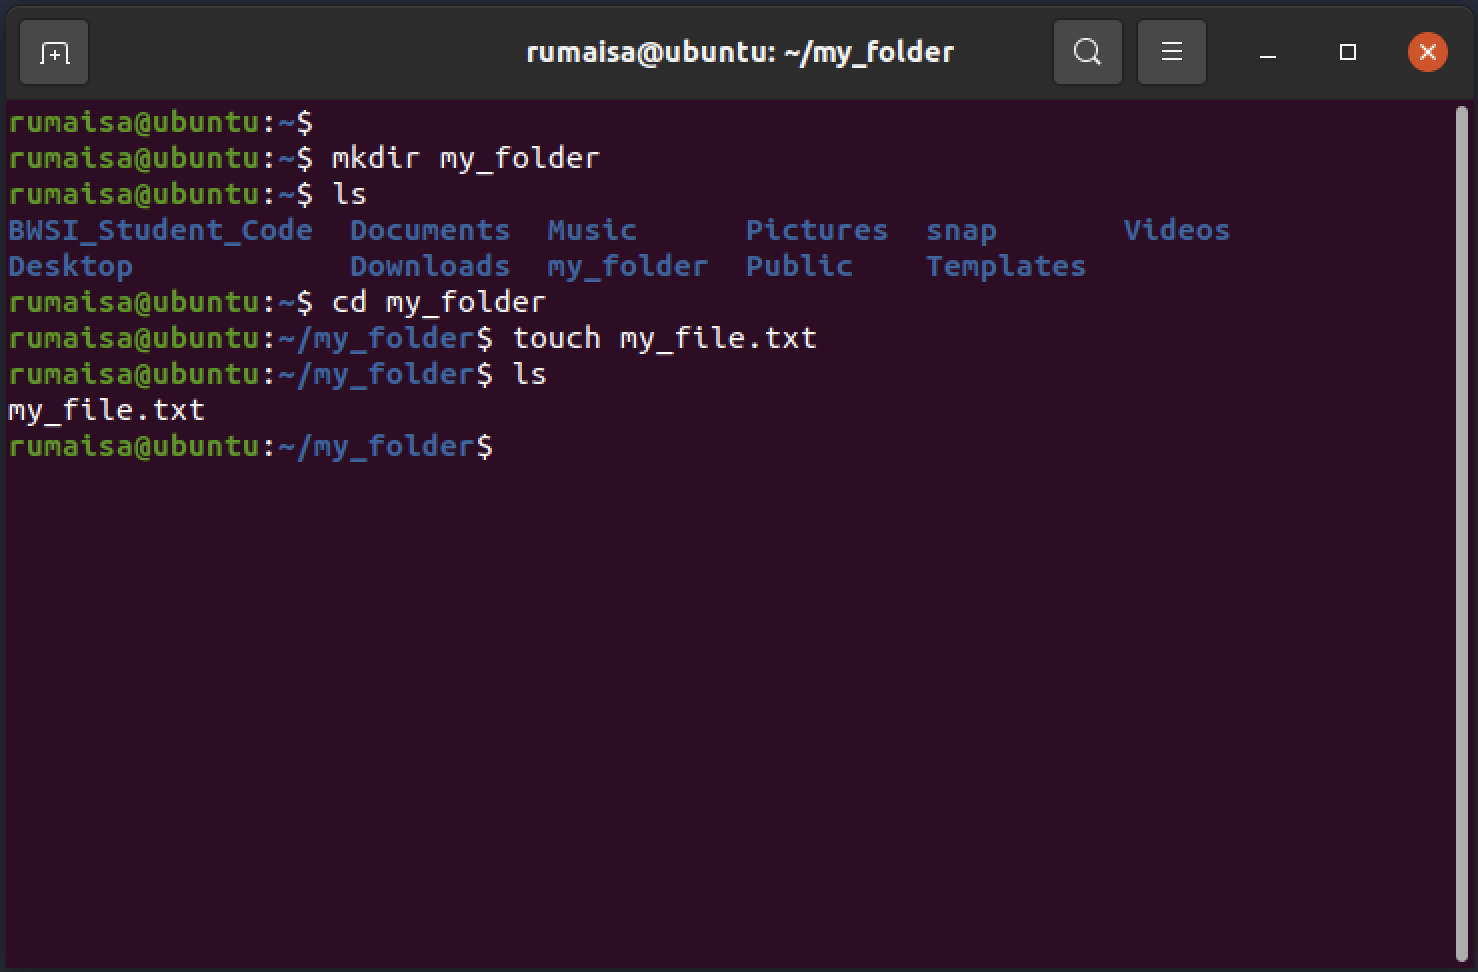
You should now be able to find my_file.txt inside the directory my_folder.
vi/vim: Command Line Editor
We will use a command line editor that is native to Unix systems called vi to edit the my_file.txt that we just created. You can find more details about how to use vi here. To learn how to use vim, see here.
create or open existing fille
Type in the following command in Terminal and pay attention to the very bottom of it. This command opens an existing file with the provided file name or creates a new file with the provided file name if it does not exist in the current directory.
vi my_file.txt

insert mode
To actually enter text into your file you need to be in insert mode. To get into insert mode please type the letter i and that should be reflected at the very bottom also.
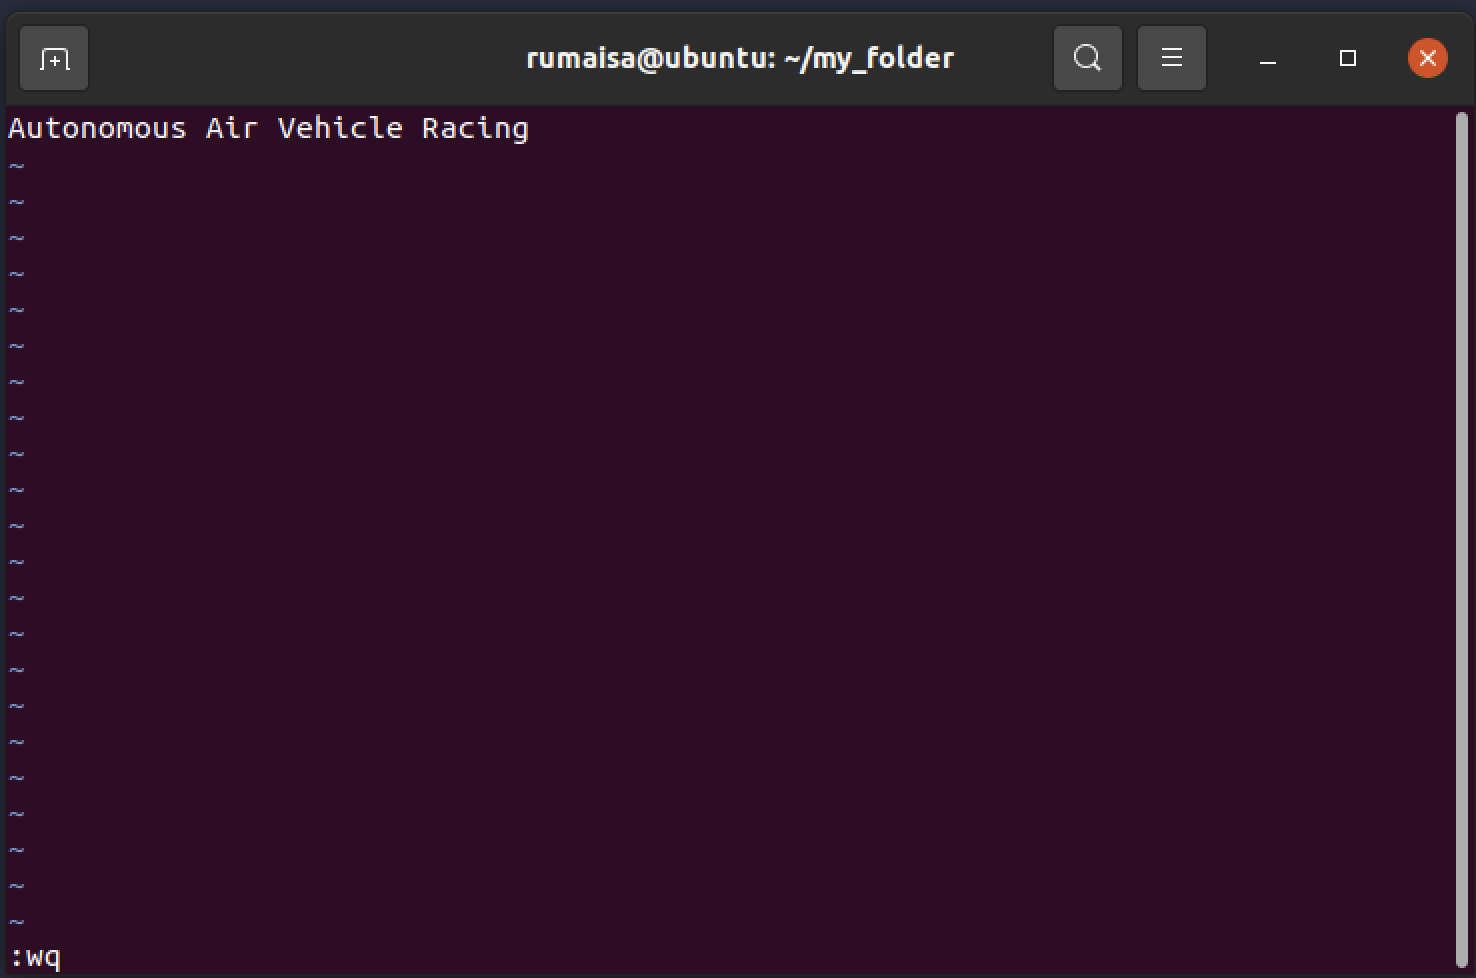
save and exit
Once in “insert mode” please type in “Autonomous Air Vehicle Racing” then exit the insert mode by pressing the esc key on your keyboard. Then, type either wq OR x AND press enter to exit and save the file. The w stands for write and q stands for quit. The difference between the two commands is that wq changes the modification time no matter what, whereas x only rewrites if the text file did not change.
cat: Print contents of file
Let’s say we didn’t want to open a new file but we wanted to see what was in it. In that case, we can print the text in the file with the cat command. Enter the following in Terminal:

You will see the text we entered earlier into my_file.txt.
mv: Move/Rename a File
The mv command quite literally stands for move and has the following structure. This command can also be used to rename files. It is used like so:
mv <file/folder we want to move> <destination>
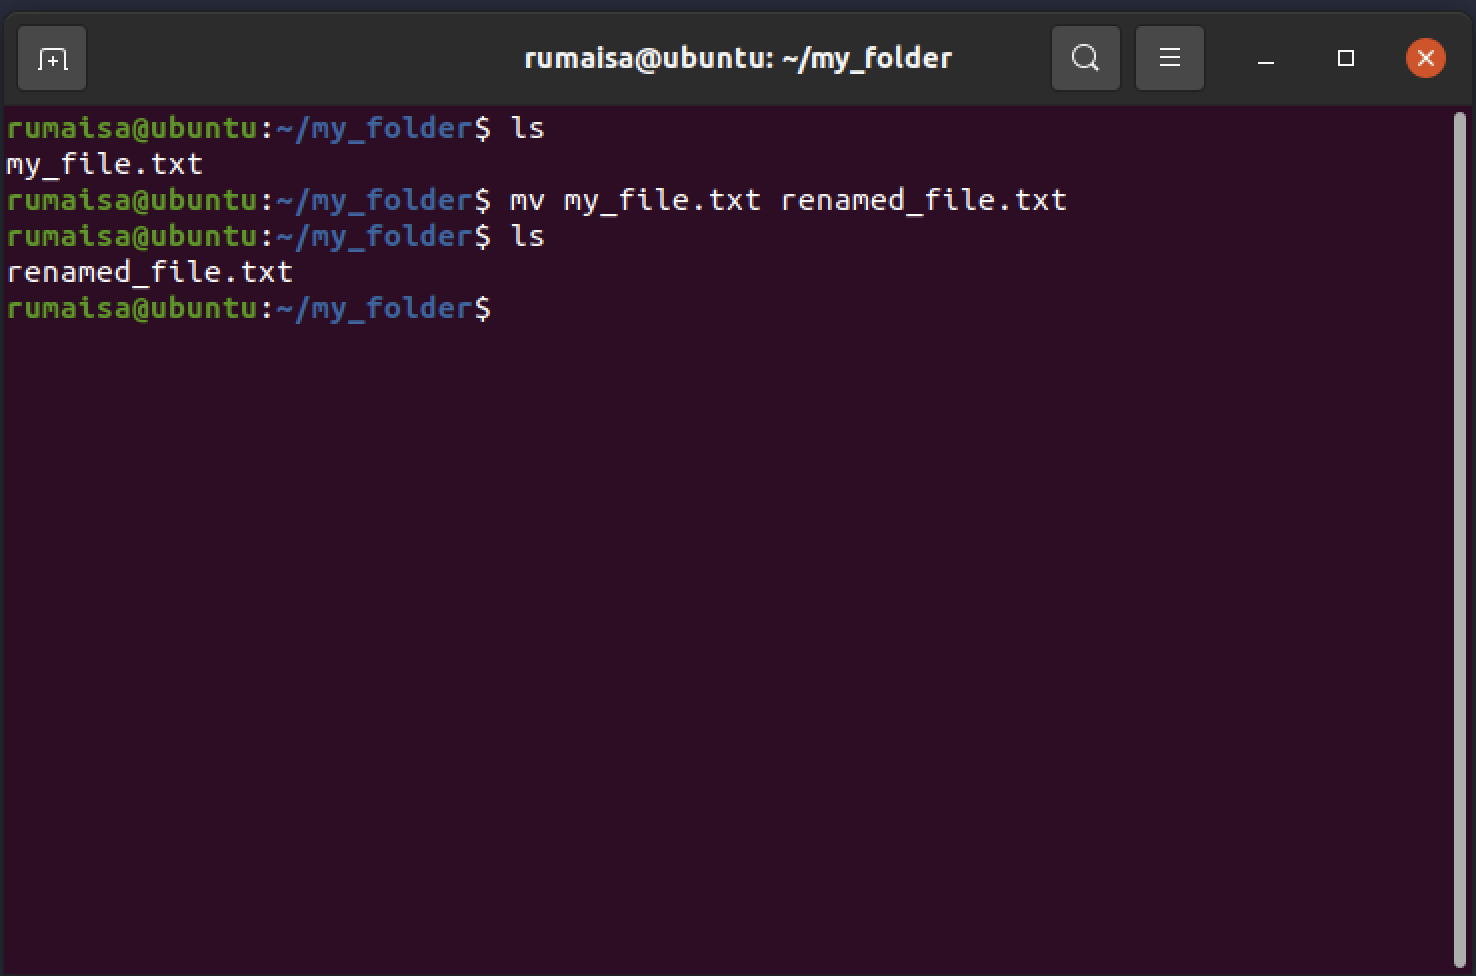
Let’s re-name the file:
mv my_file.txt renamed_file.txt
We can also move the renamed file:
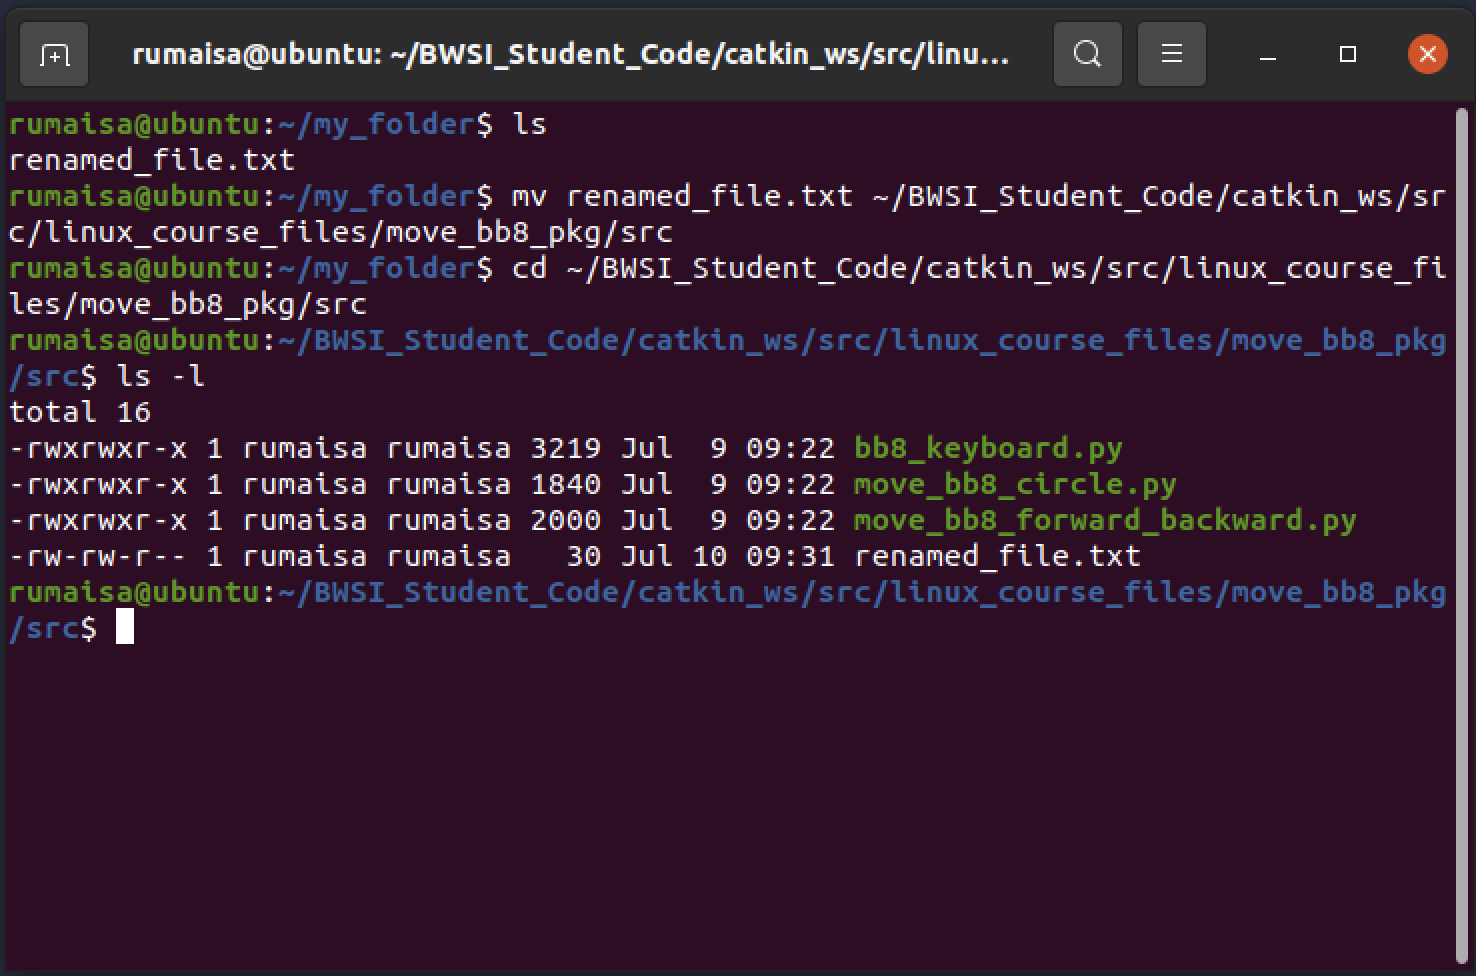
mv renamed_file.txt ~/BWSI_Student_Code/catkin_ws/src/linux_course_files/move_bb8_pkg/src
Then, let’s change our directory into the desired workspace:
cd ~/BWSI_Student_Code/catkin_ws/src/linux_course_files/move_bb8_pkg/src
Please type in the ls -l command again in order to see the files. You’ll notice that there is a difference between the colors of the files.
Reverse Search
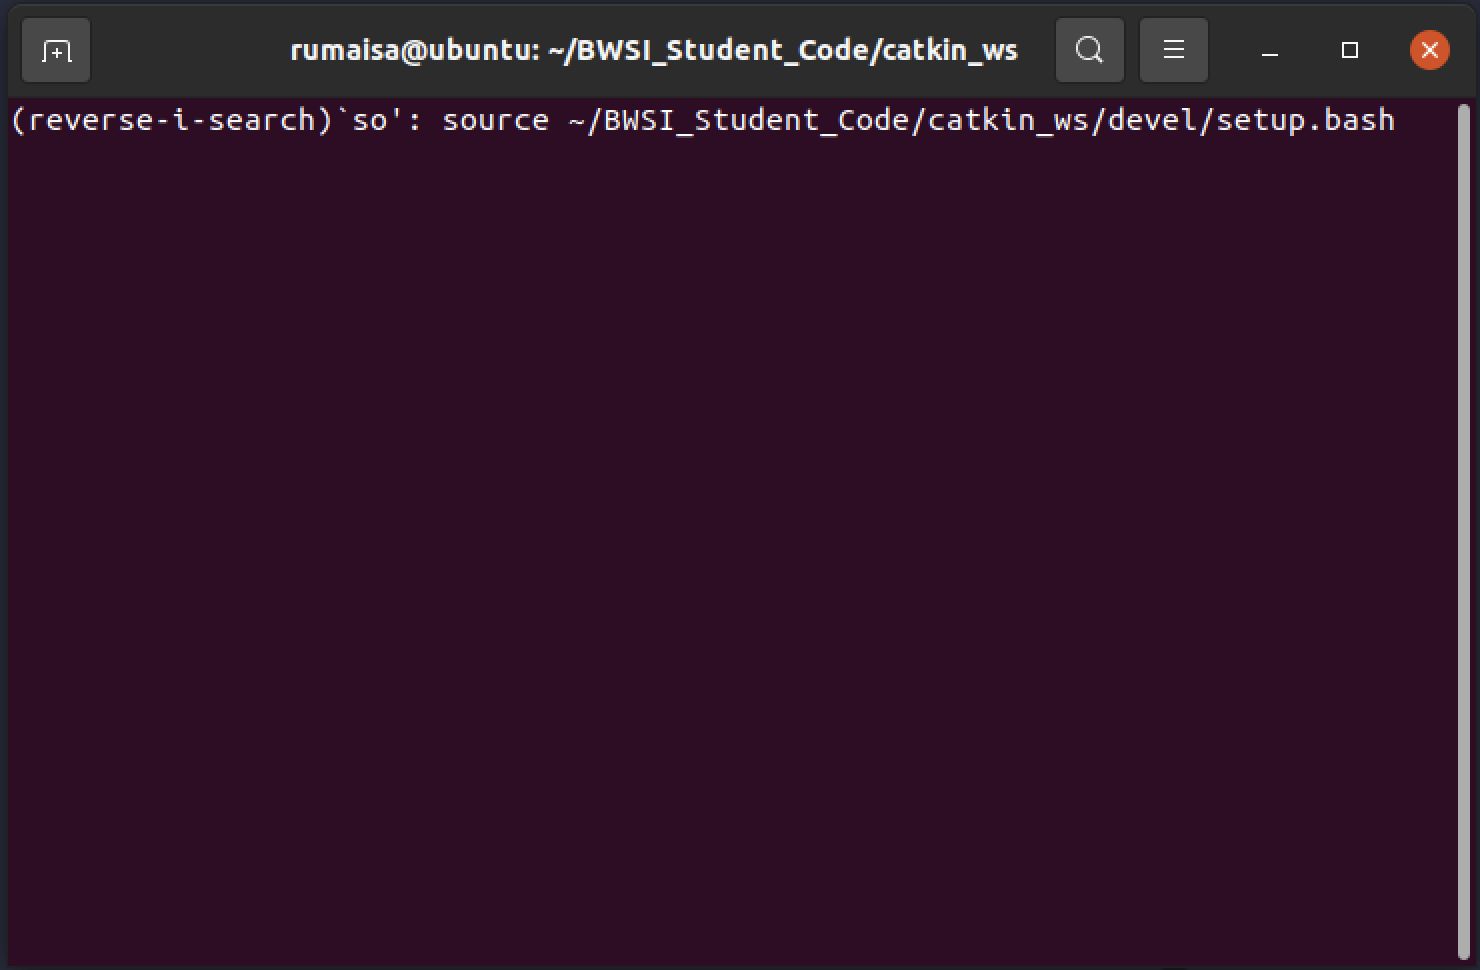
If you don’t remember a command you used before but you remember a keyword from it (or you’re just lazy), then you can use reverse search. Simply press Ctrl + R keys and then type your keyword. If the first thing that comes up isn’t what you want, keep pressing the Ctrl + R keys until you get the command you want. Once you get the command you want, press enter to use it.
rm: Deleting File/Directory
You can remove files or directories using the rm command. You can learn more about using the rm command here.
Warning Commands with
rmare permanent/irreversible. It will not appear in Trash like you may be used to.
Enter the following in Terminal:
cd ~/BWSI_Student_Code/catkin_ws/src/linux_course_files/move_bb8_pkg/src
rm -i renamed_file.txt
Using rm -i will ask the user if they are sure they want to delete the file. Type y then press enter to confirm.
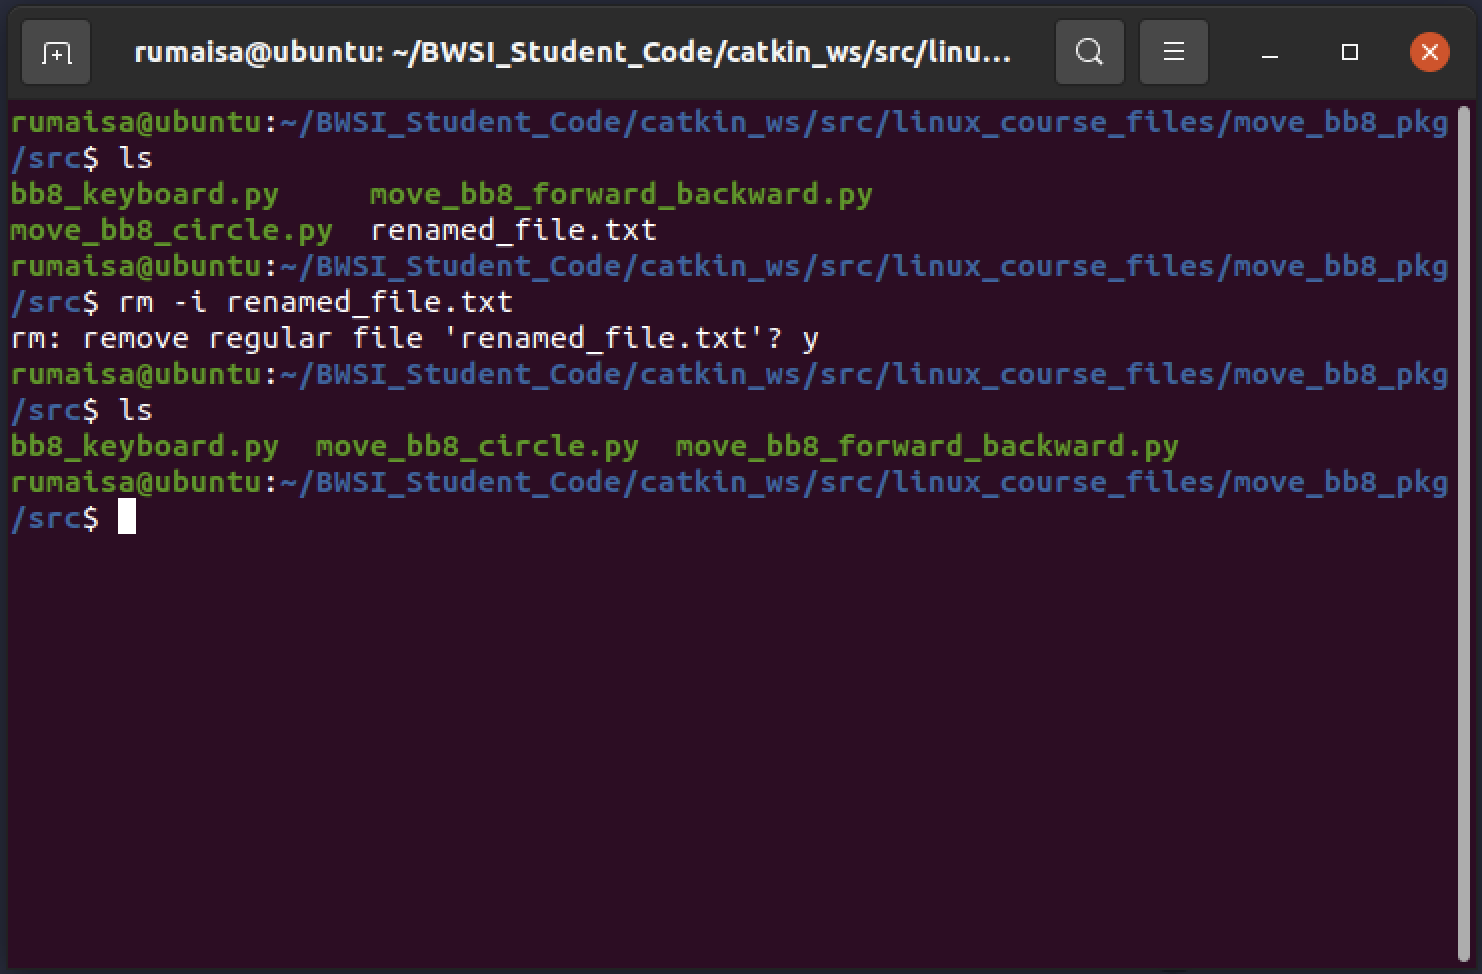
When using ls, should see the file has been removed.
Now we’re ready for the practical!