Student Drone Setup
This documentation will introduce you to the physical setup required to use the drone in ‘desktop mode’ and connect via WiFi to the drone, as well as specific instructions on how to setup the drone’s directory structure.
Physical Setup
Locate your team backpack and have the team hardware specialist start unpacking in accordance with the following directions.
Connect your white power strip to a nearby wall tap.
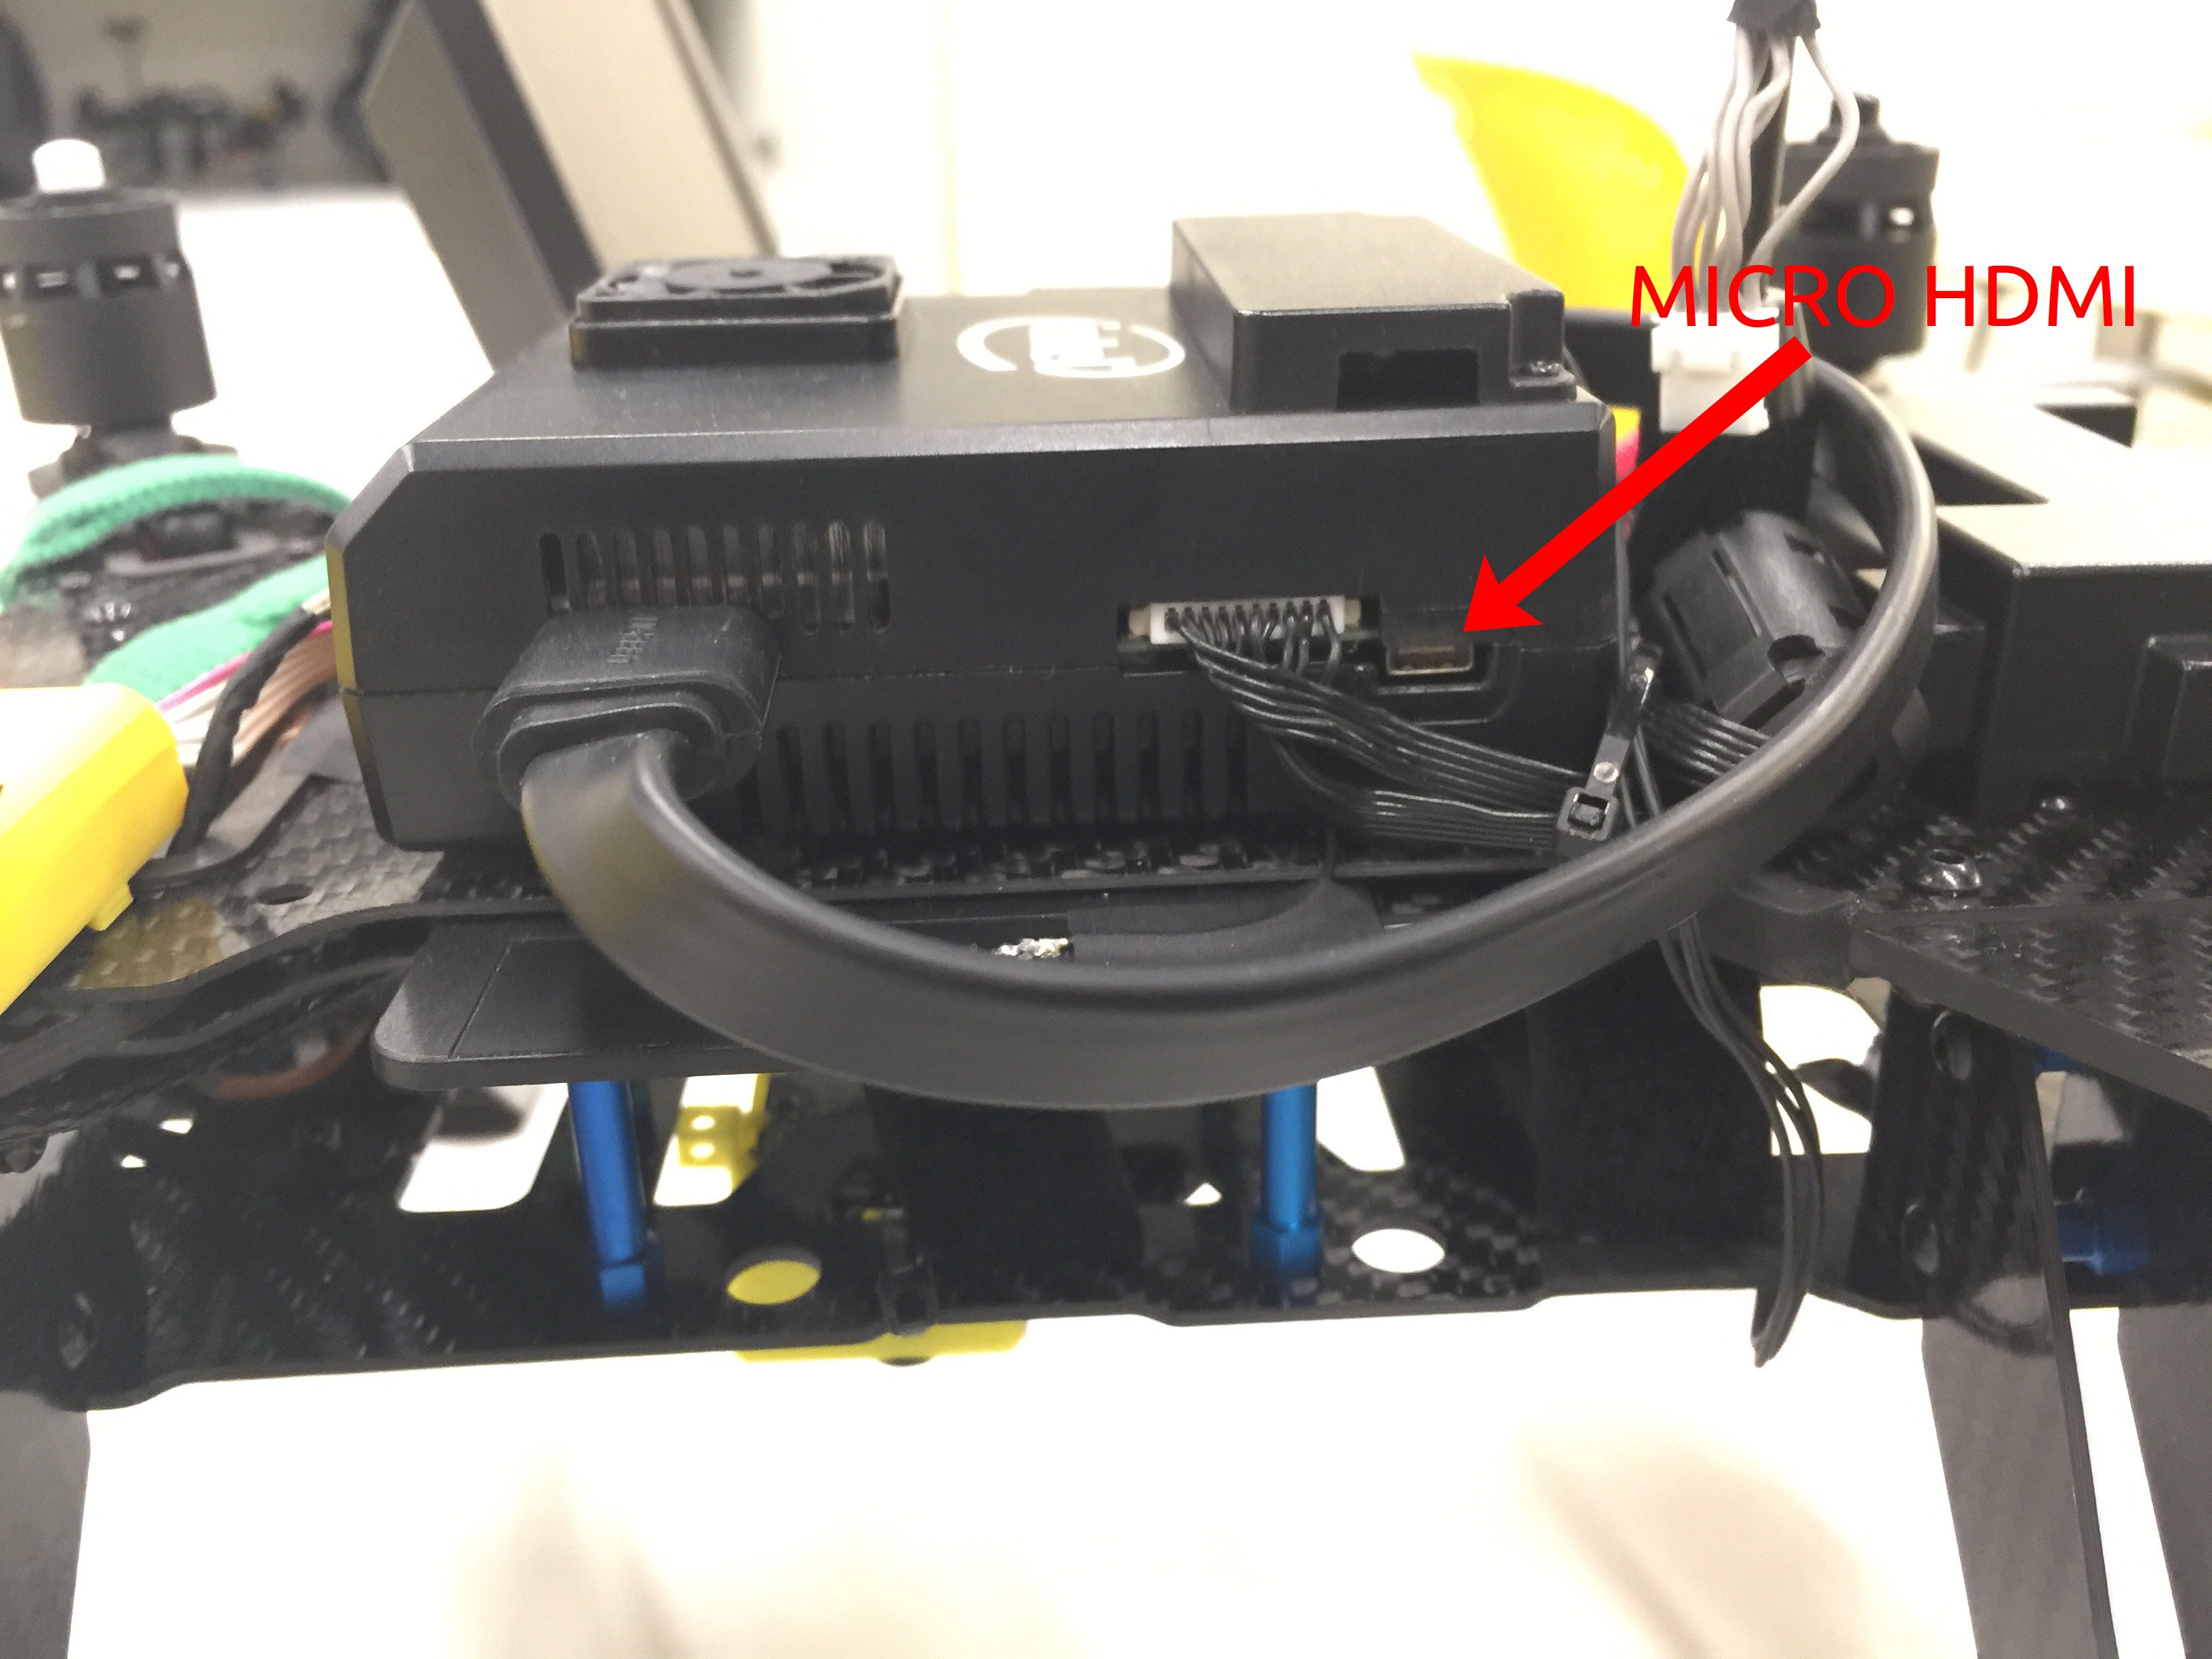
Plug in your Eyoyo display to the white strip using a DC power supply that fits into the DC IN port on the Eyoyo. Next, take the Micro HDMI to HDMI cable and plug it into the Micro HDMI port on the drone.
If your drone’s USB cable is attached to another cable (leading to a sensor on the drone), ask an instructor to help you unplug the USB cable. You will then be able to connect it to the USB hub in your backpack, which will be powered by a USB to wall plug adapter. Attach the keyboard and mouse to this hub.
Take the wall plug to XT60 (yellow battery plug) adapter and attach it to the drone’s XT60 port, located near the power button.
Press the power button on the drone. It should light up white and blue, and the fan should begin to spin.
If prompted, press enter twice when the Ubuntu boot screens appear on the Eyoyo. Alternatively, you can let the bootloader select the correct version for you by not touching any keys/mouse for roughly 10 seconds.
You are now on your drone! Proceed to Logging In.
Logging In
You will be prompted for a password when you log in to your drone. Ask an instructor for the password to your drone.
You are now logged into the drone.
You will now learn how to SSH (secure shell) into your drone. This will allow you to run terminal commands over WiFi without using the Eyoyo/keyboard/mouse (desktop mode) combo.
Ground Commander: Open your team laptop, and open a Terminal window (using Terminator/Terminal).
Type
ssh -Y uav@<yourteam>.beaver.worksand press Enter. (replace<yourteam>with the hostname of the drone, listed on the drone’s terminal asuav@<yourteam>)When prompted for the password, use the previously obtained drone password to login. SSH (and other Bash utilities) will not show the password as you type it.
If prompted, type
yesand press enter.You should now be connected to the drone via SSH over WiFi.
Software Setup
Logging into MIT Github
Each team has an account on github.mit.edu tied to its email account. The general format is bwsiuav+<teamname>@gmail.com and the password is as given by the instructors.
Visit github.mit.edu on your team laptop and login using the aforementioned credentials under Touchstone Collaboration.
Click on your profile photo in the top right corner and go to settings.
Click SSH and GPG Keys. Keep this window open while you follow the next few steps.
Git and SSH Keys
On the Terminal window in which you SSH’d into the drone, (it will say
uav@<teamname>:) follow the following instructions on how to generate an SSH key for Github: https://help.github.com/articles/generating-a-new-ssh-key-and-adding-it-to-the-ssh-agent/
Note:
Be sure to use your team’s email, as listed above, for your_email@example.com. It is also unnecessary to have a passphrase on the SSH key.
Once complete, follow these directions about adding your newly minted SSH key to the MIT Github account: https://help.github.com/articles/adding-a-new-ssh-key-to-your-github-account/
Note:
Be sure you are using github.mit.edu NOT github.com to submit the SSH key.
Directory Setup
On the SSH window on your team laptop, enter the following commands
cd ~
mkdir -p ~/bwsi-uav/catkin_ws/src
cd ~/bwsi-uav/catkin_ws
catkin_make
echo "source ~/bwsi-uav/catkin_ws/devel/setup.bash" >> ~/.bashrc
source ~/.bashrc
cd src
git clone https://github.com/BWSI-UAV/aero_control.git
cd aero_control
git remote add upstream https://github.com/BWSI-UAV/aero_control.git
cd ~/bwsi-uav
git clone https://github.com/BWSI-UAV/laboratory.git
cd laboratory
git remote add upstream https://github.com/BWSI-UAV/laboratory.git
cd ~/bwsi-uav
git clone https://github.com/BWSI-UAV/documents.git
cd documents
git remote add upstream https://github.com/BWSI-UAV/documents.git
Go to github.mit.edu on the team laptop with your team’s Github account. Make a new private repository titled
documentsand copy the remote repository URL found here, making sure to select SSH:
Note:
The copied url should start with git@github.mit.edu, if it starts with https://github.mit.edu than you need to go back and select the SSH option.
Go to the SSH’d terminal window and type the following commands:
cd ~/bwsi-uav/documents
git remote set-url origin <remote repo URL, pasted>
git remote -v
git push origin master
where <remote repo URL, pasted> is the URL you have just copied from github.mit.edu.
Go to github.mit.edu on the team laptop with your team’s Github account. Make a new private repository titled
laboratoryand copy the remote repository URL found here, making sure to select SSH:Go to the SSH’d terminal window and type the following commands:
cd ~/bwsi-uav/laboratory
git remote set-url origin <remote repo URL, pasted>
git remote -v
git push origin master
where <remote repo URL, pasted> is the URL you have just copied from github.mit.edu.
Go to github.mit.edu on the team laptop with your team’s Github account. Make a new private repository titled
aero_controland copy the remote repository URL found here, making sure to select SSH:Go to the SSH’d terminal window and type the following commands:
cd ~/bwsi-uav/catkin_ws/src/aero_control
git remote set-url origin <remote repo URL, pasted>
git remote -v
git push origin master
where <remote repo URL, pasted> is the URL you have just copied from github.mit.edu.