ARTag Localization
In this tutorial we will continue to explore how the various sensors on board the Intel Aero Drone can provide information on where the drone is in the world (i.e. localizations), which is a critical first step to autonomous navigation. Here we will explore the use of visual fiducial known as an ARTag. See below for an example.

In the optical flow tutorial, we saw how the combination of the TeraRanger distance sensor, downward facing camera, and “black box” service/software aero-optical-flow enabled the new flight mode of POSITION CONTROL which was significantly easier to pilot than MANUAL.
This tutorial will similarly use an onboard camera and pre-compiled libraries/software to provide a form of positioning information. In contrast to the optical flow tutorial, we will be using the front-facing RealSense camera suite and the ar_track_alvar ROS package (see here for more details).
Launching RealSense & ar_track_alvar
To launch both the forward-facing camera and ar_track_alvar, you will need to use ROS’s built in roslaunch tool. We have already set up a launch file that does both of these for you.
roslaunch
Syntax: roslaunch <package name> <launchfile>.launch [<args>] In this case, the package will be aero_control and the launch file will be ar_visualization.launch. Go ahead and run roslaunch aero_control ar_visualization.launch. This should start both the camera and ar_track_alvar.
ar_track_alvar topics
ar_track_alvar publishes the following topics:
/visualization_marker
/ar_pose_marker
See if you can determine what type of message is published on each of these channels using rostopic info /<topicname> for both. After doing that, you might try rostopic echo /<topicname> and holding an AR tag in front of the drone.
Visualizing with rviz
On the drone in desktop mode, type rviz in an open Terminal window. The ROS visualization software will then open. You will need to select certain options to make rviz work properly. 1. Select Fixed Frame in the top left corner of rviz and change it from map to camera_rgb_optical_frame 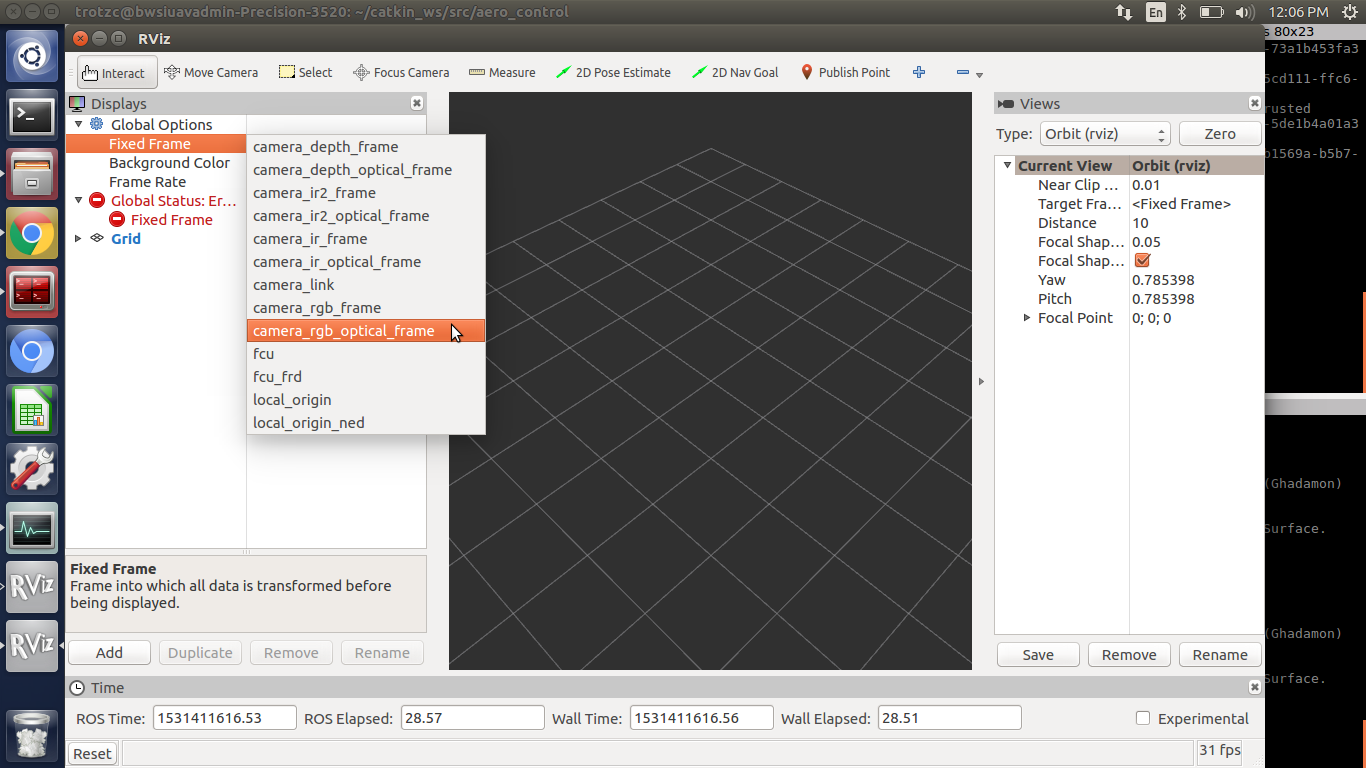 2. Click Add in the lower left corner of rviz.
 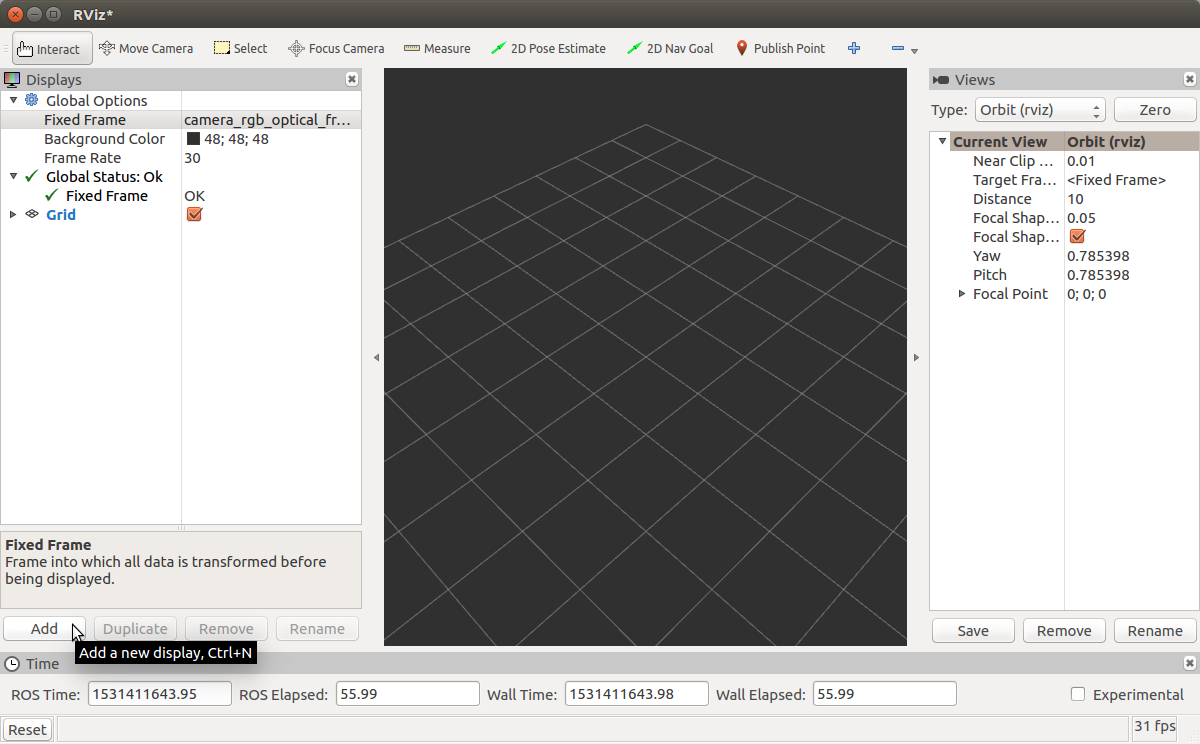 3. Add a Camera Display from
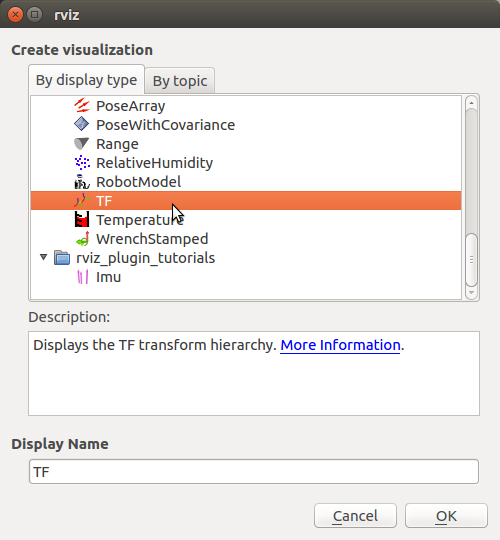
 /camera/rgb/image_color. 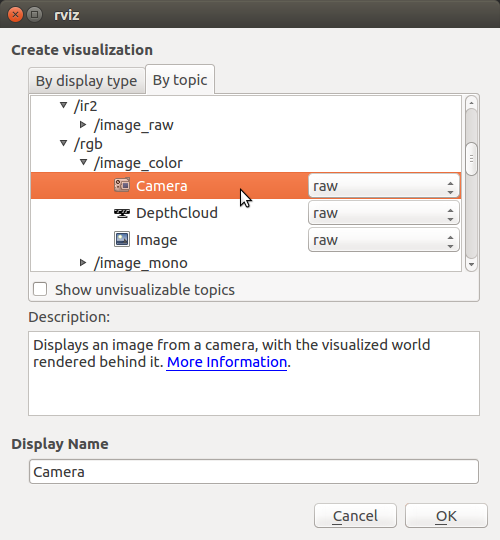 4. Add a TF display.
 5. Deselect “All Enabled” under “Frames” in the TF display options. (You can also resize/move your Camera Display to be more visible)
 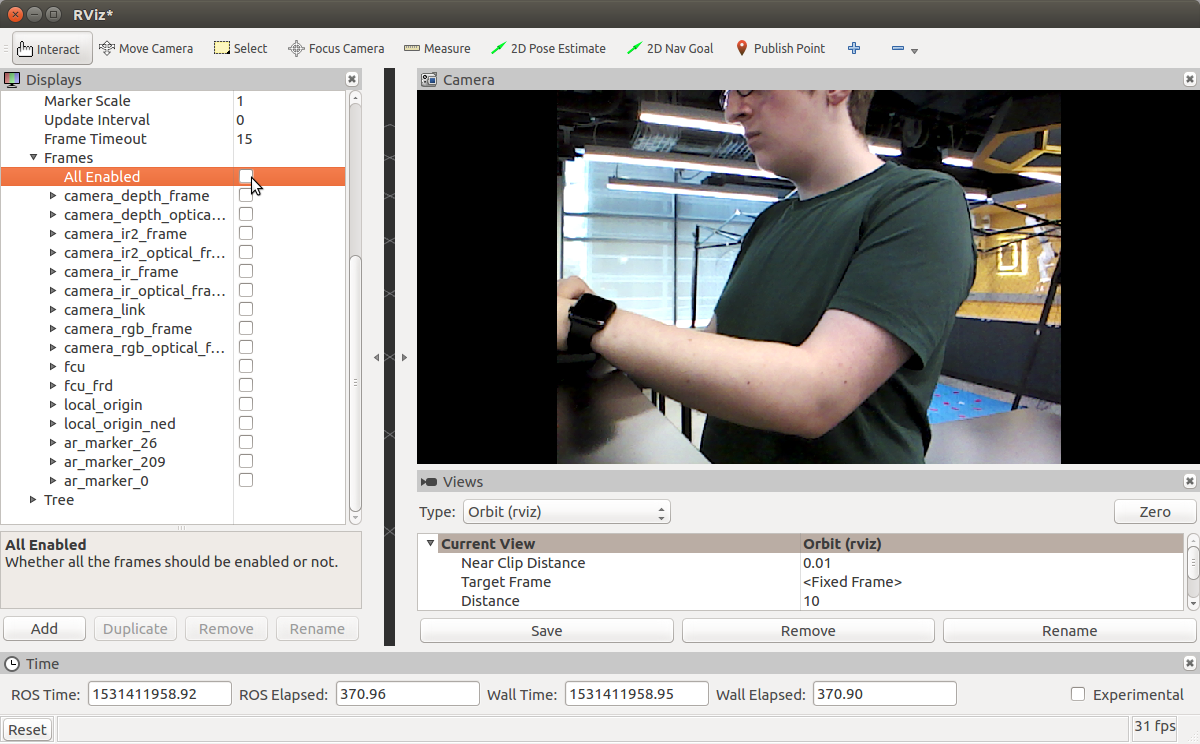 6. Move an AR tag into frame and watch the label/axes change as you move it around/twist it.
Processing Marker
In preparation for this week’s challenge, you will need to write your own ROS node that subscribes to the appropriate ARTag topics, parses important information from messages, and displays instructions to the Ground Commander to aid in flight maneuvers.
First let’s make sure you have the required libraries installed on your drone/computer:
sudo apt install ros-kinetic-ar-track-alvar
First, pull from upstream in aero_control. Your aero_control directory should now have a files called ar_localization/src/ar_checker.py that has blanks for you to fill in. Your goal with this file is to read AR tag detections from ar_track_alvar and check to see that the drone is within the proper range from the tag to be counted as a detection (by default, 0.9 - 1.1m but we may change this if it proves too easy). Your code should then log the detection or, if not in the proper
position, directions on getting to the proper position using the information from ar_track_alvar. It should then log the tag as “seen” and display an “Already Seen” message if it appears again.
You will be able to test your ar_checker.py using ar_checker.launch, also in your aero_control directory. When roslaunching, you can use roslaunch aero_control ar_checker.launch 2>/dev/null to get rid of the error stream that MAVROS puts out.
Testing with bag files
We can test the ar_checker.py using a ROS bag file (indicated by a .bag extension). Syntax for rosbag: rosbag play <file>.bag.
Link for ar_checker.bag: https://goo.gl/uDMUxz
Testing procedure for rosbag:
Run
roscore &in Terminal on your VM.Open another Terminal window and run
rosbag play ar_checker.bagin the proper directory (likely~/Downloads).Run your
ar_checkernode in a third Terminal window by typingpython ar_checker.pywhile in the properaero_controldirectory.You can visualize the images in the bag file using
rqt_image_view. Note: the detections will not start to appear until ~10 seconds into the 30 second bag file.